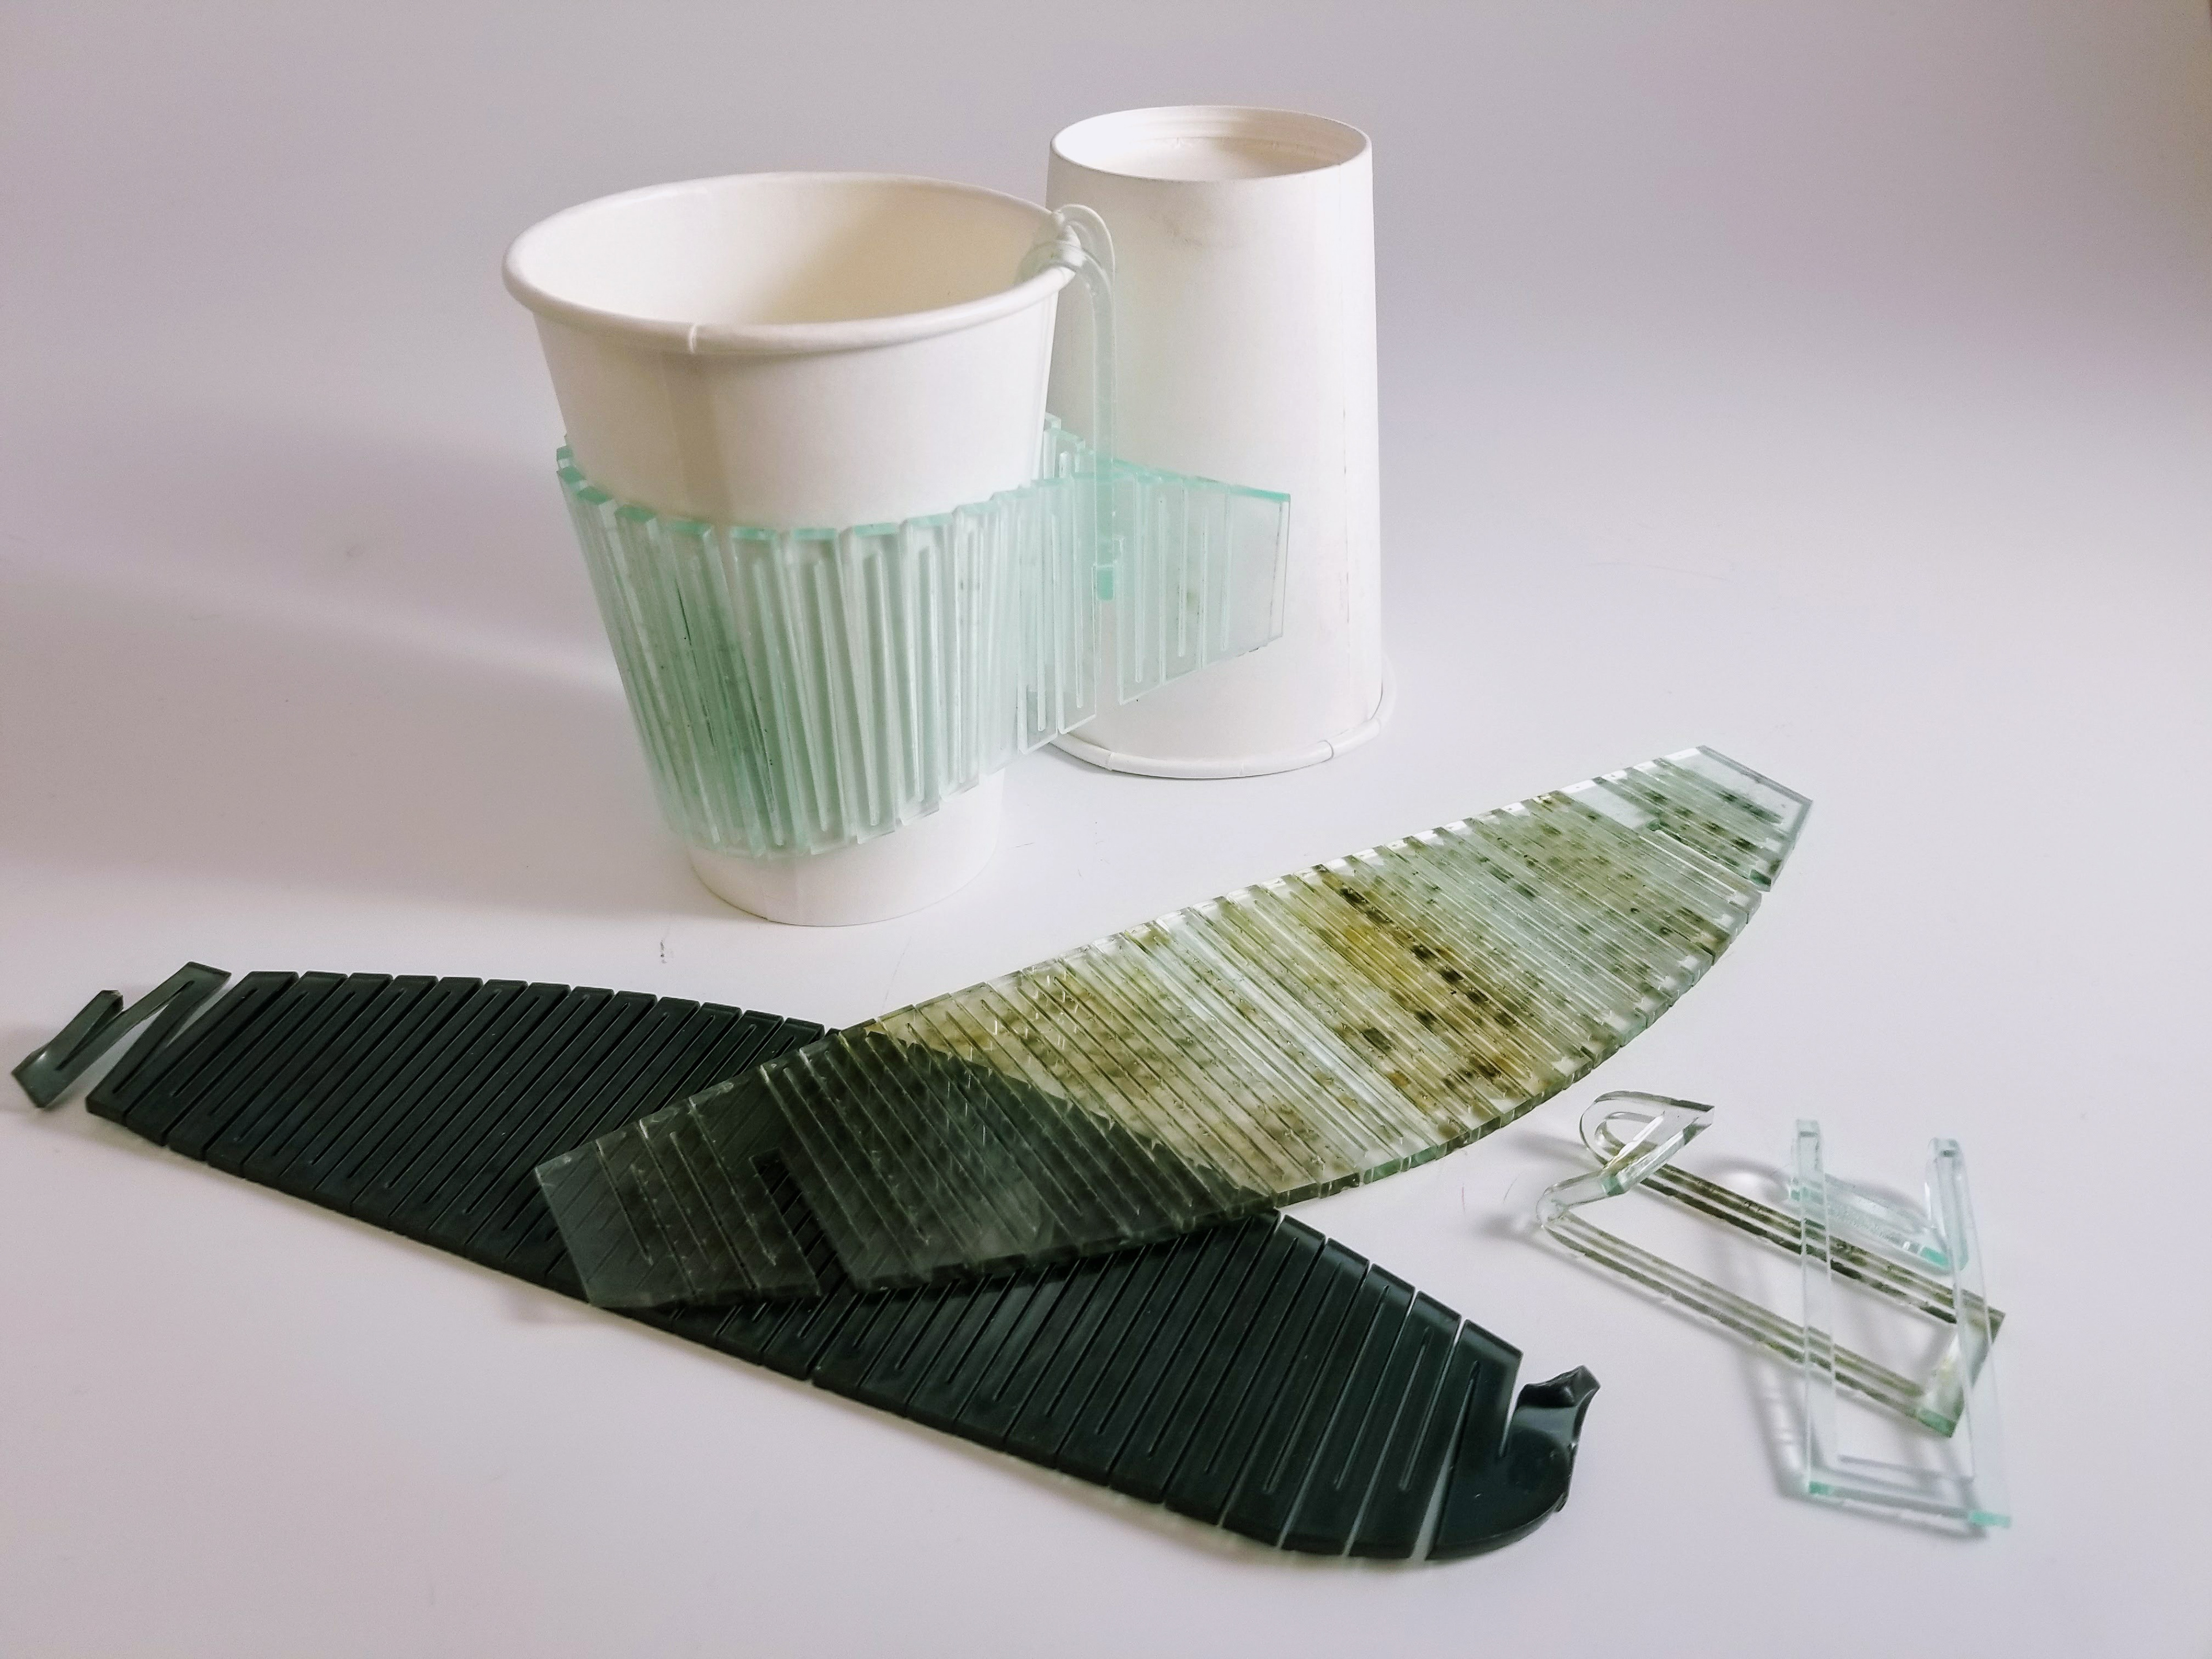
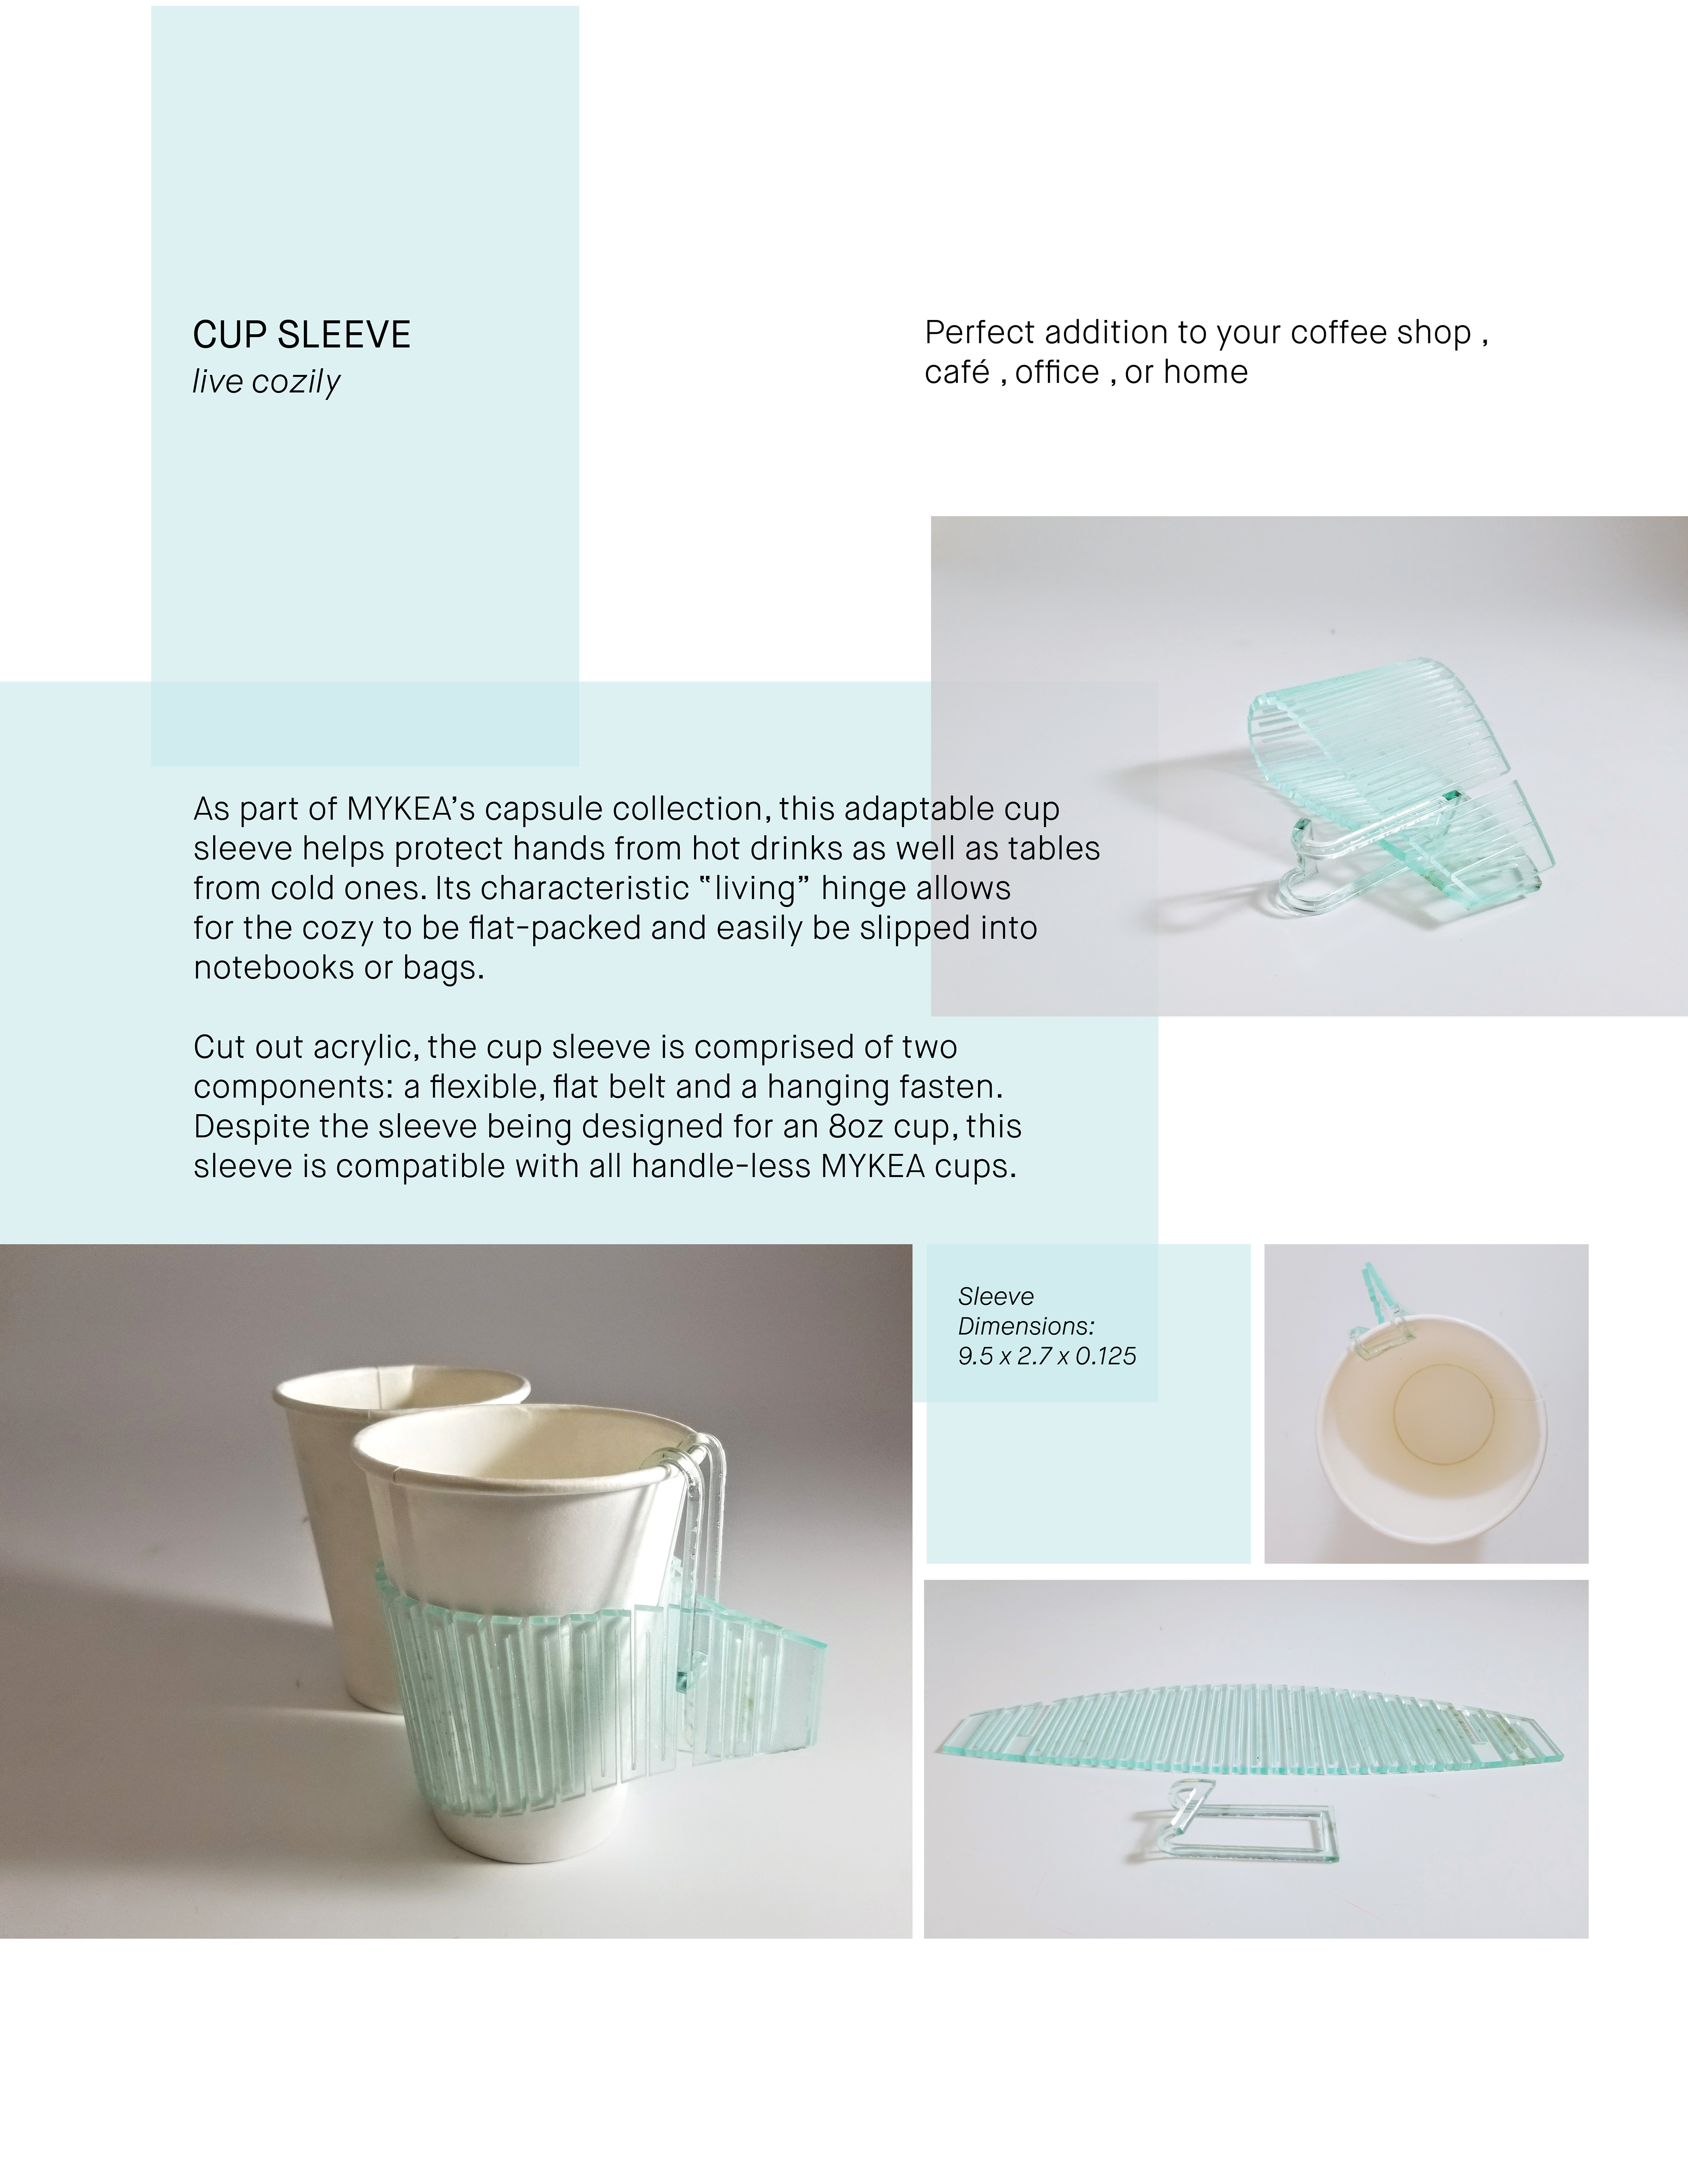
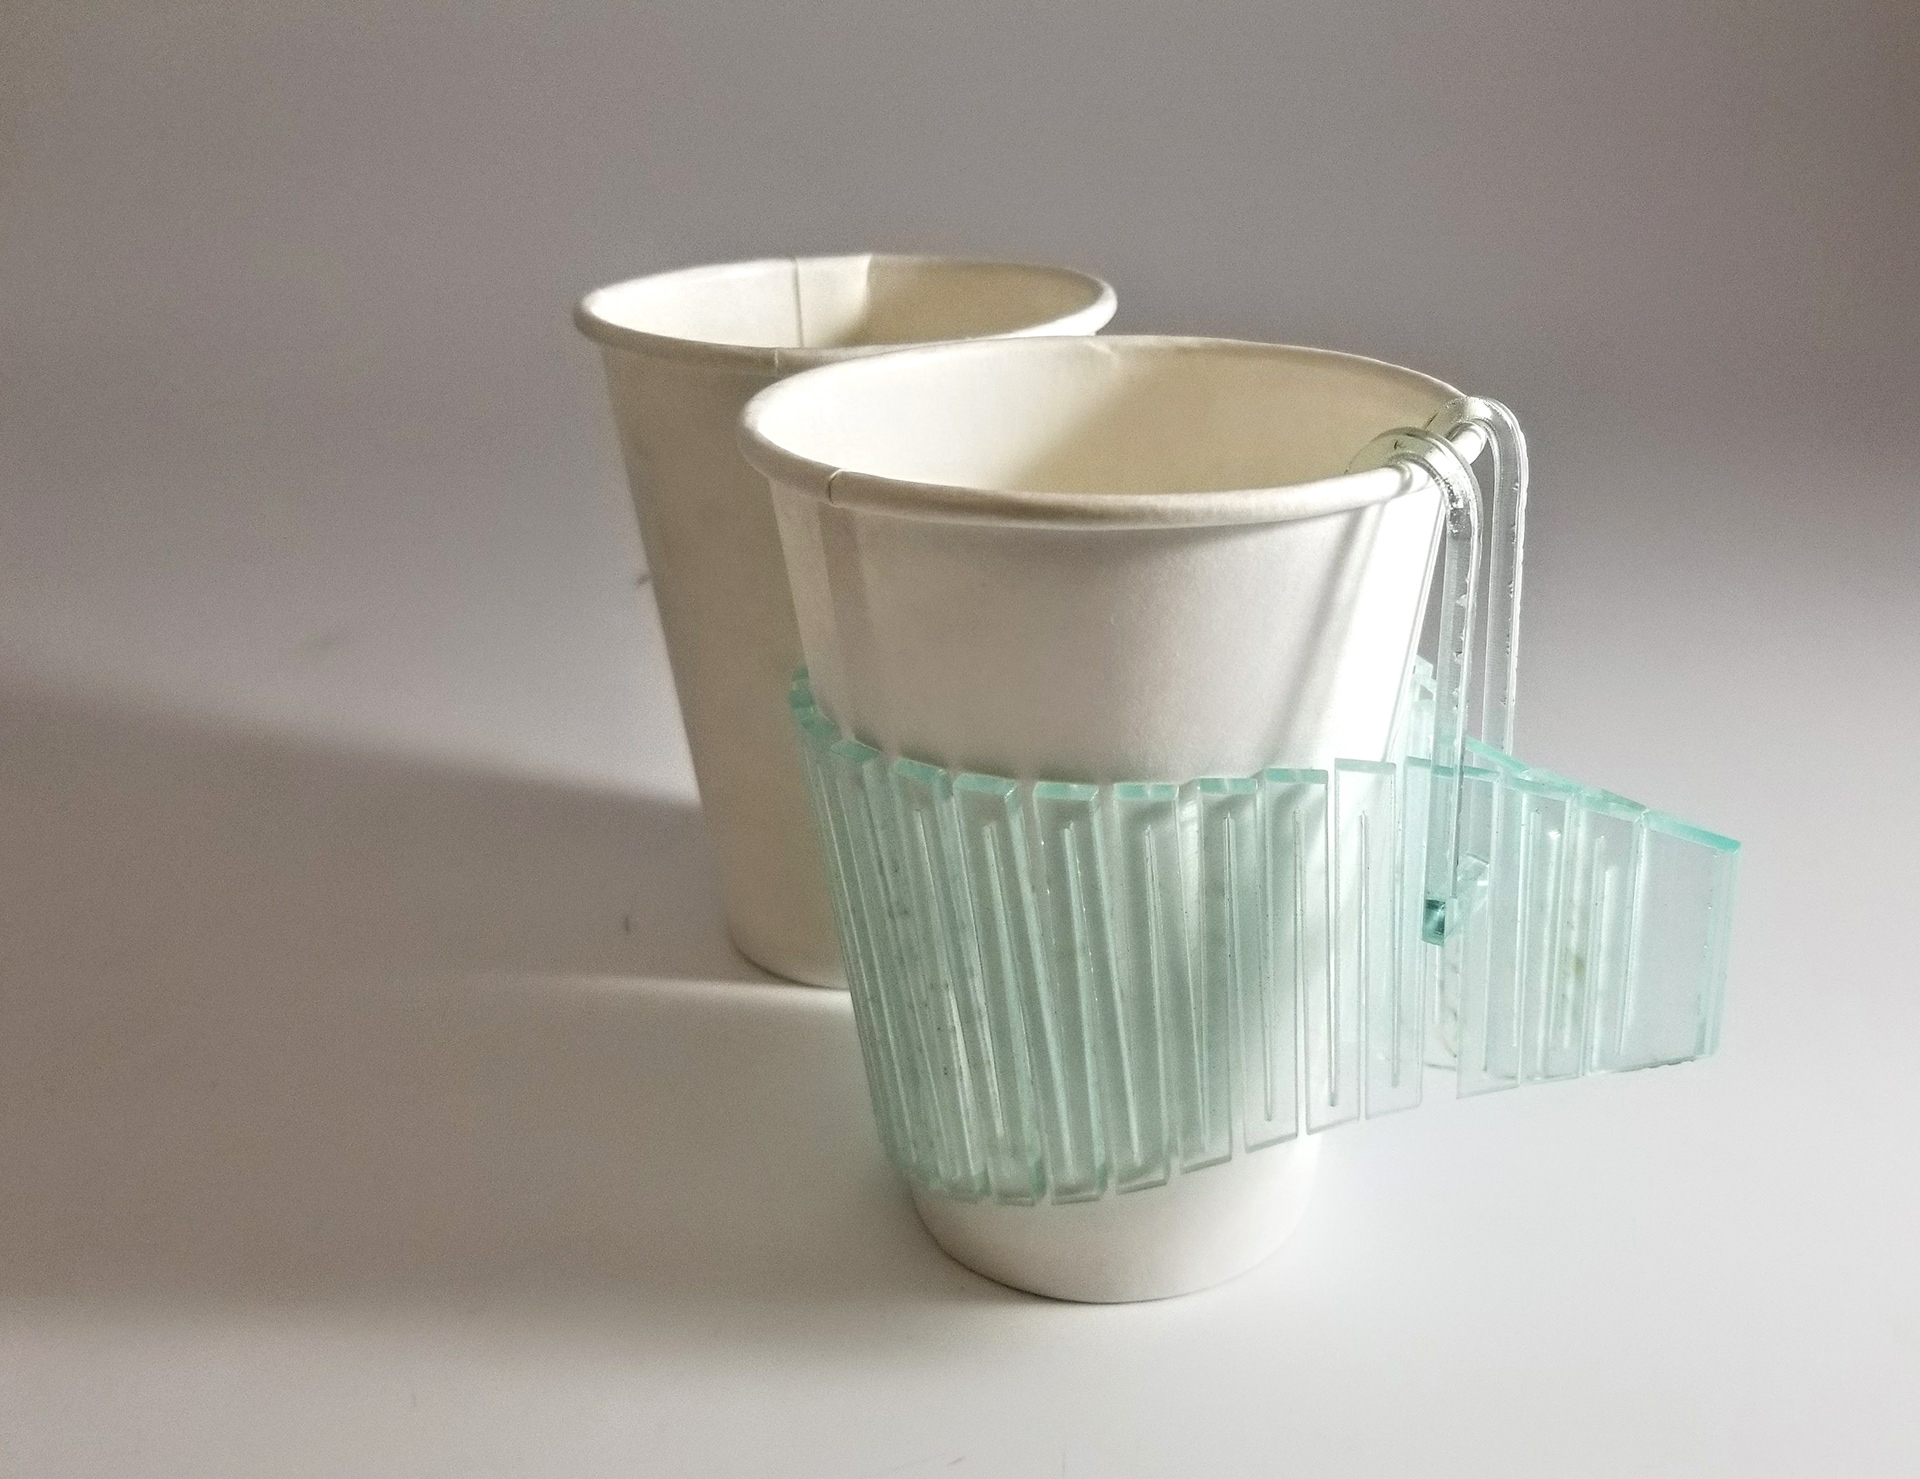
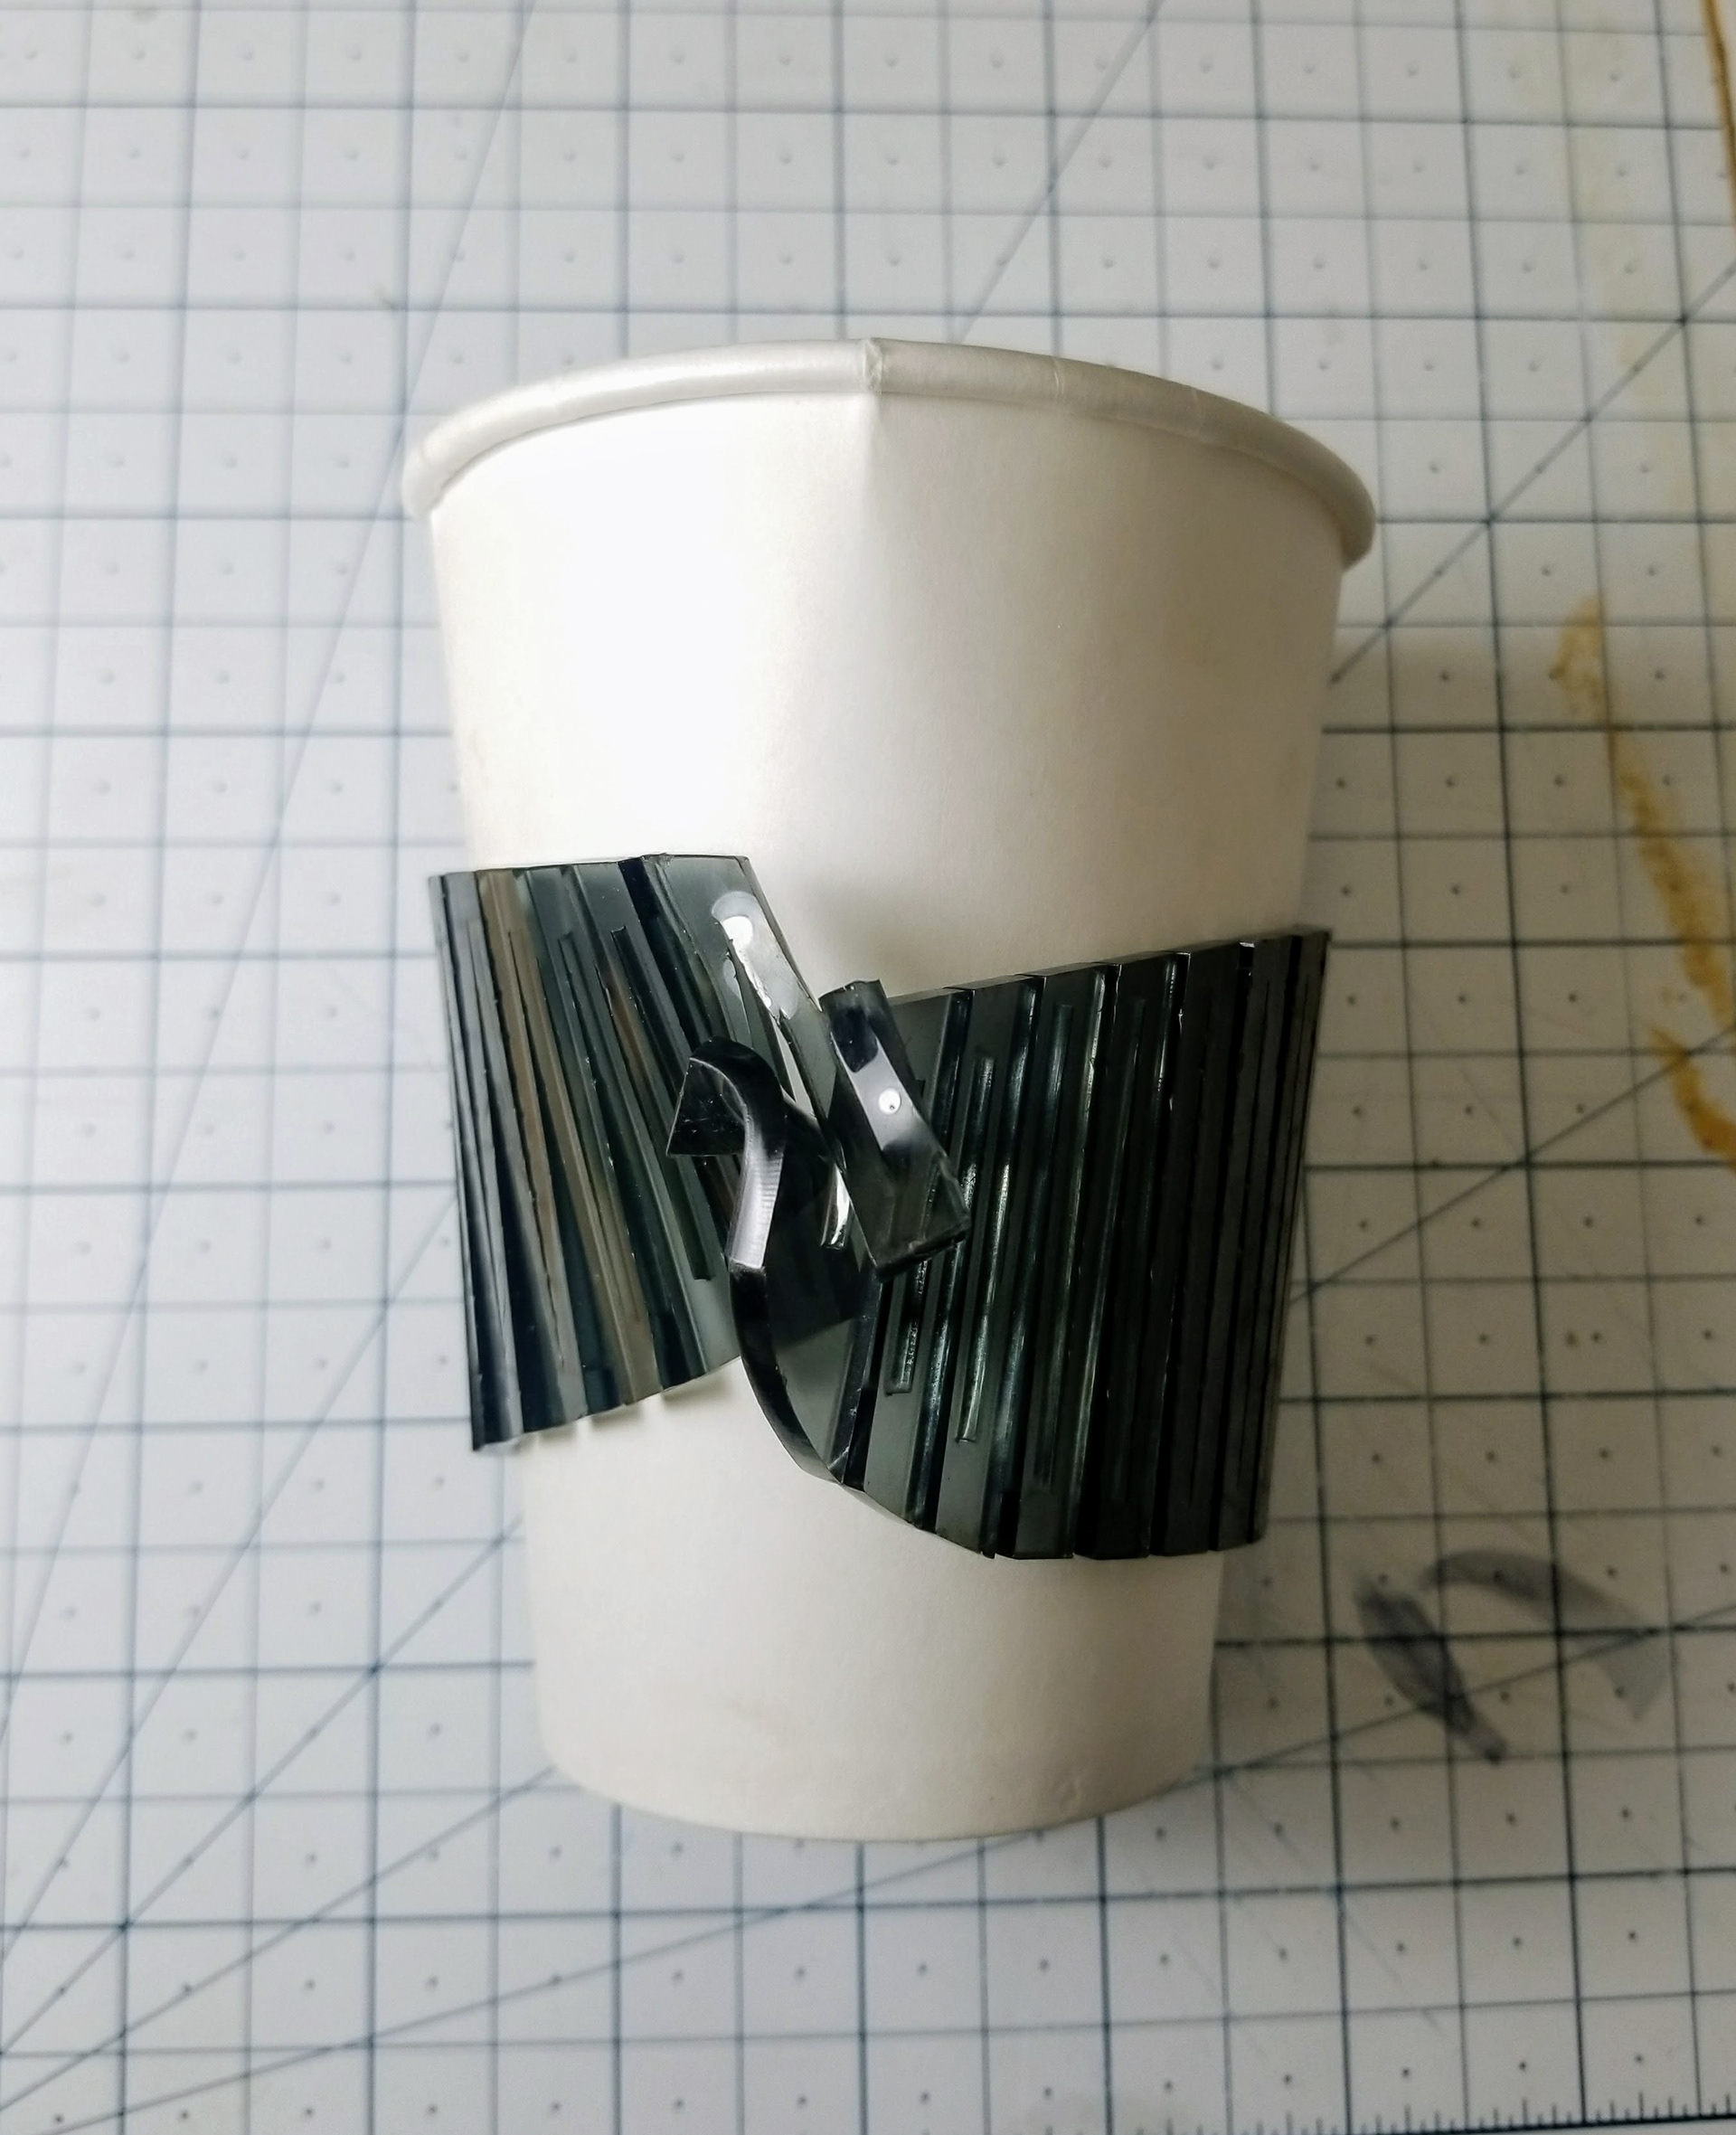
As part of MYKEA's capsule collection, this adaptable cup sleeve helps protect hands from hot drinks as well as tables from cold ones. Its characteristic "living" hinge allows for the cozy to be flat-packed and easily be slipped into notebooks or bags.
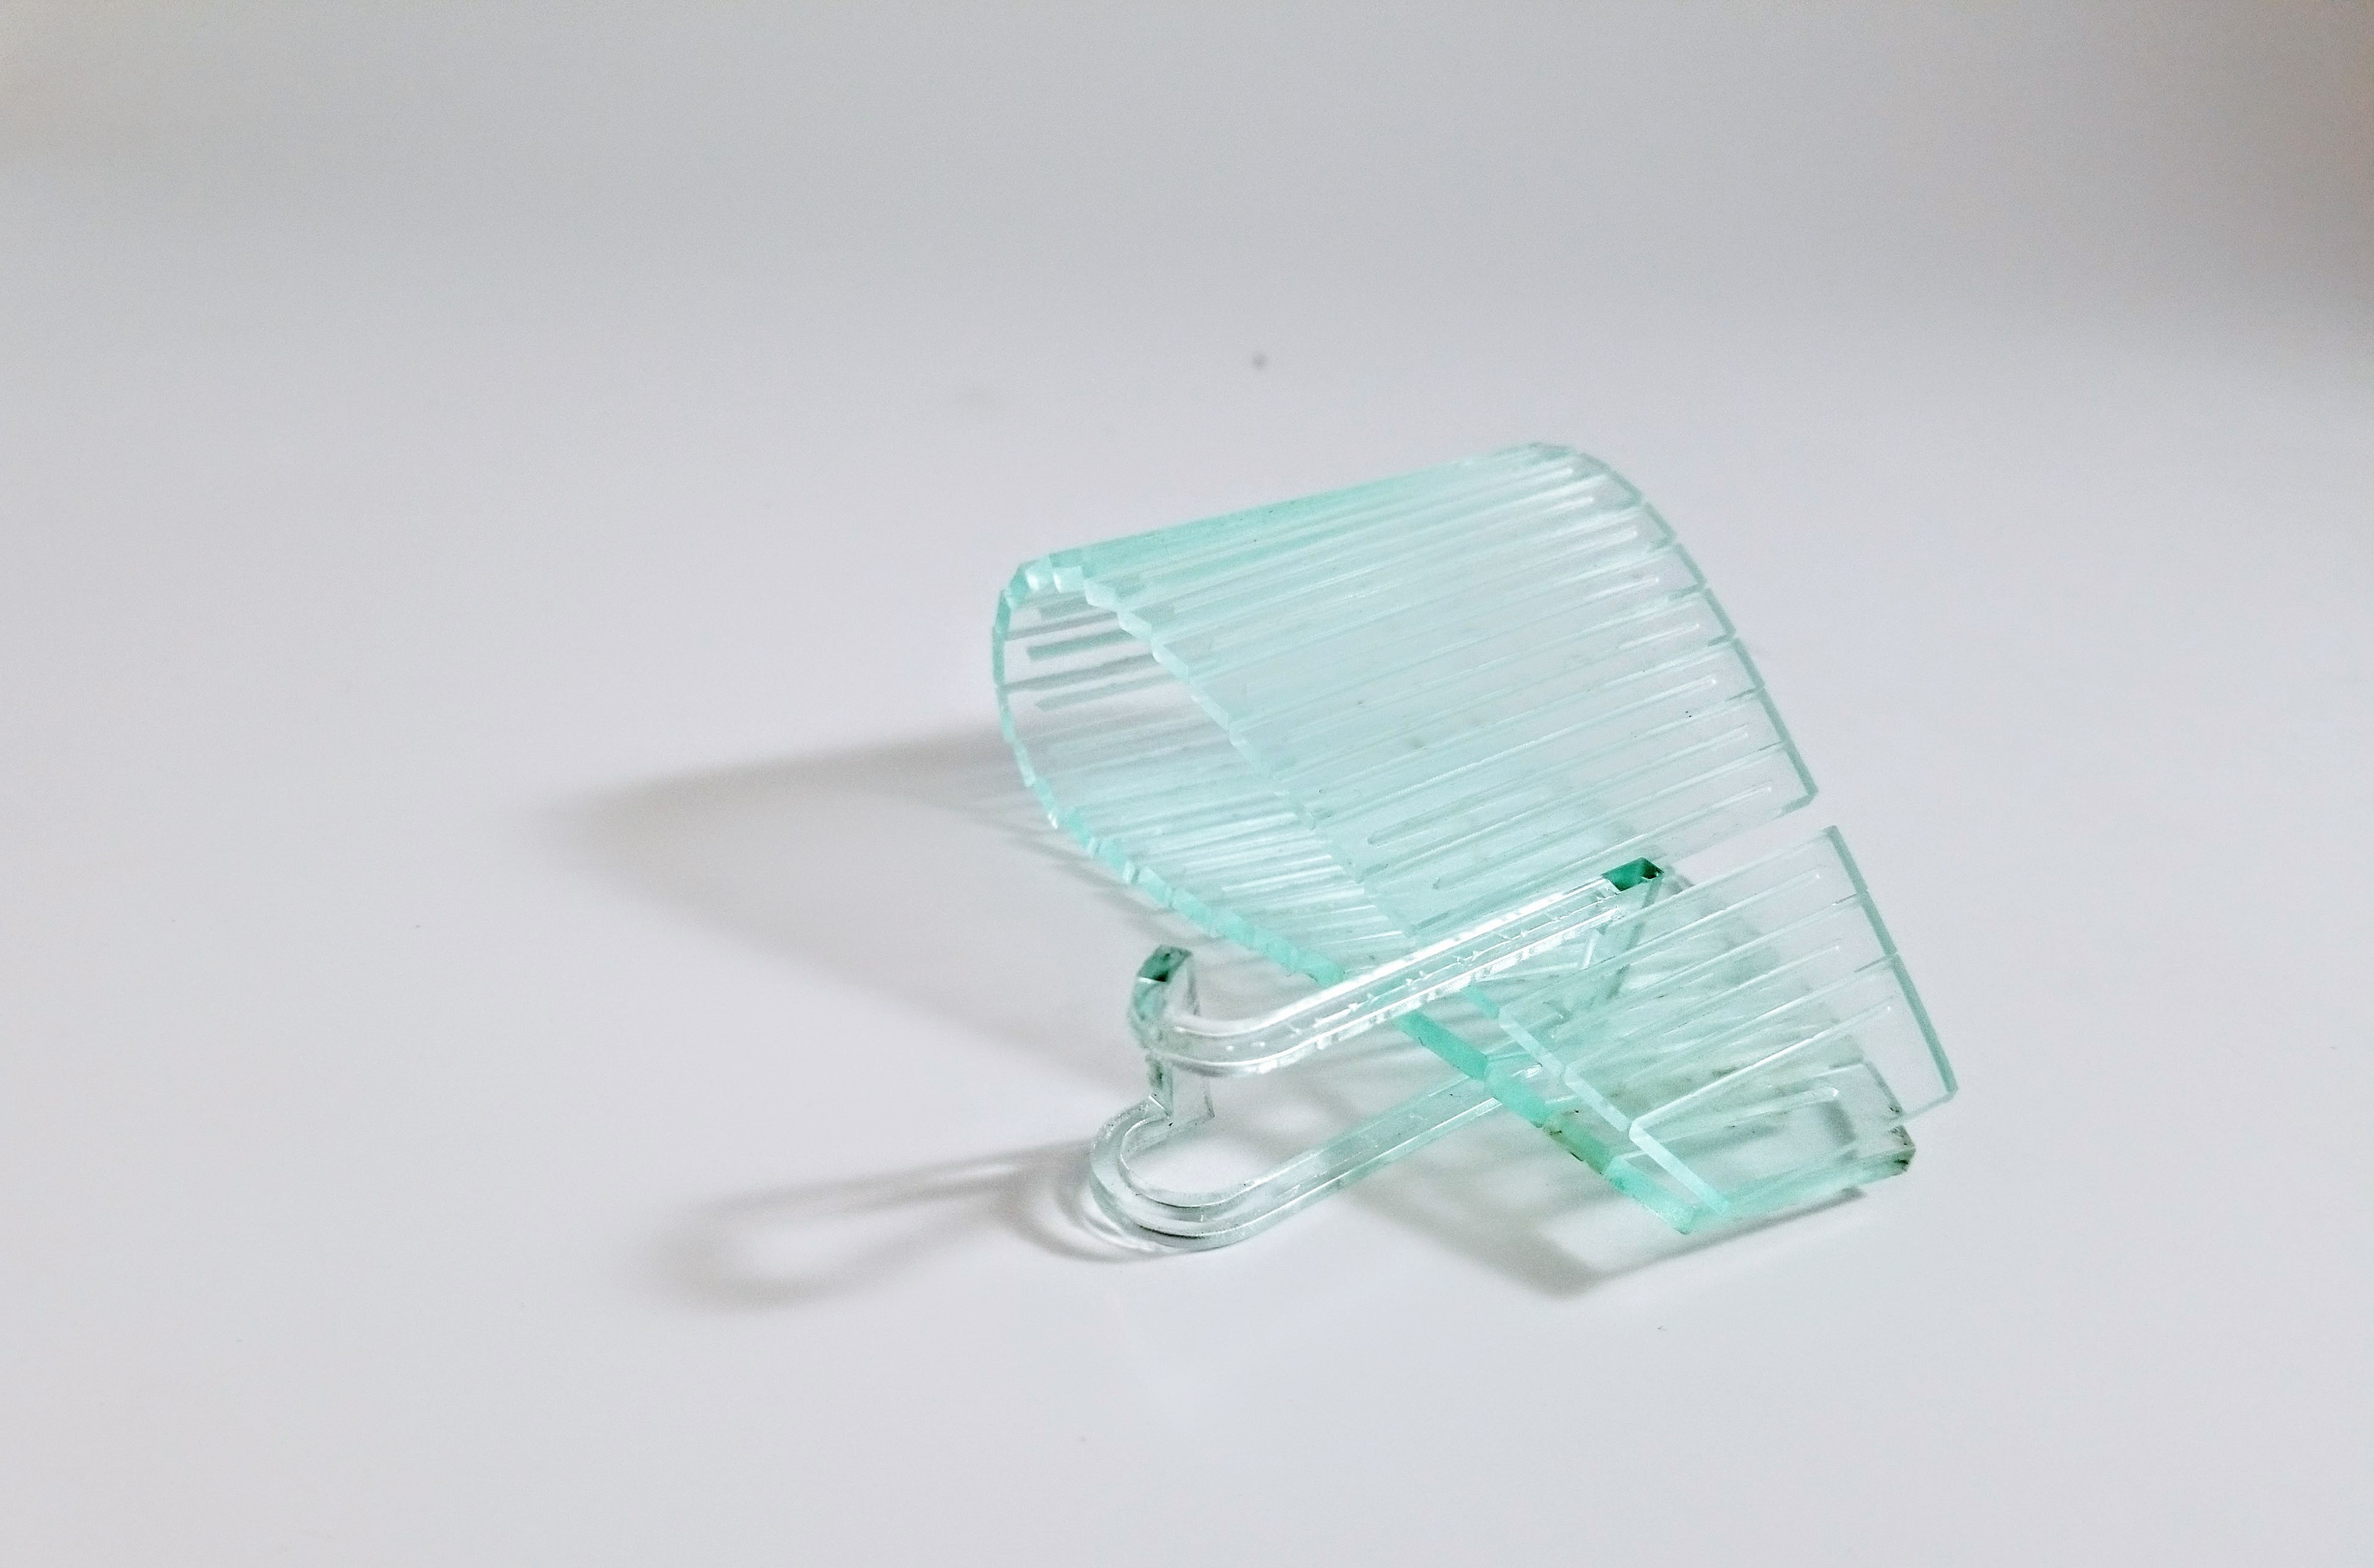
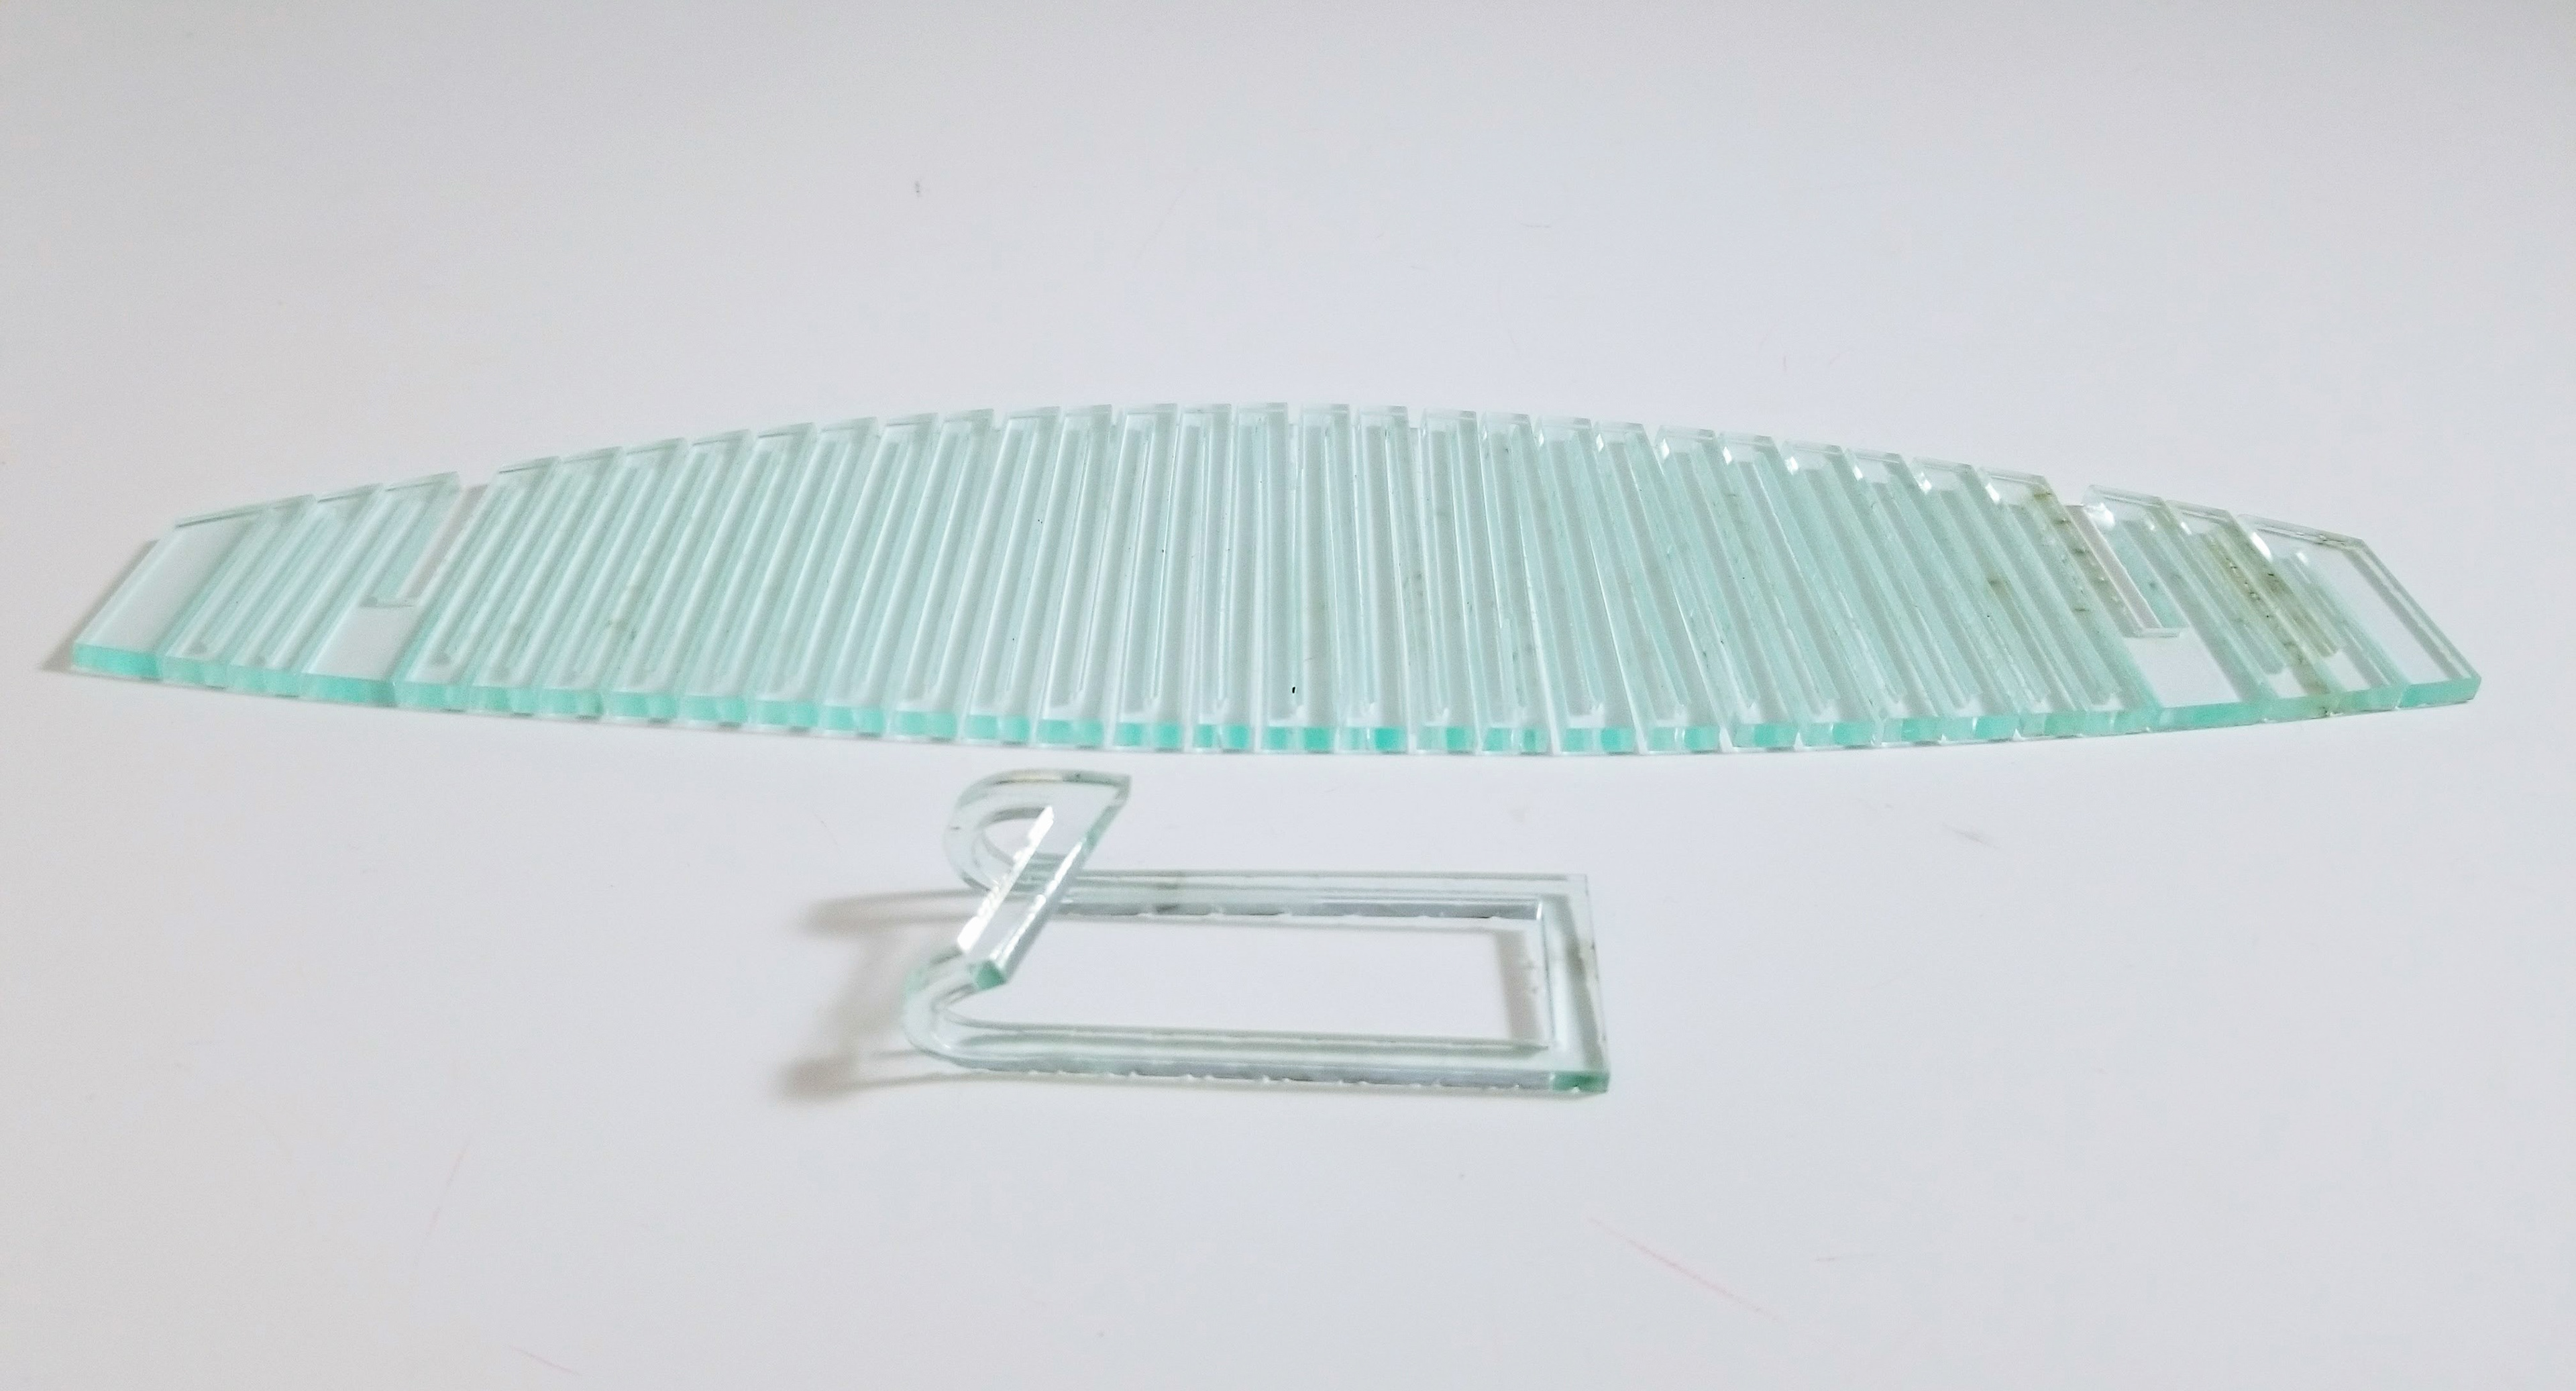
Made of cut acrylic, the cup sleeve is comprised of two components: a flexible, flat belt and a hanging fasten. Despite the sleeve being designed for an 8oz cup, this sleeve is compatible with all handle-less MYKEA cups.
Product Sheet
PROCESS
Concept to completion, how did we get here?

Let's begin
After hearing the project prompts, I knew immediately that I would go down the MYKEA route. To begin, I thought about acrylic as a material to sort of evaluate it's capabilities. Especially since, we were equipped with a heat gun, acrylic had alot of potential. Some basic prompts I gave myself were:
1. Cut the acrylic into components that mesh a form a volume ( use Solidworks)
2. Take advantage of the heat gun and mold some sort of twisted... lattice... thing (my issue with this was that it would probably be an art project before it was a cup holder)
In addition to considering what form I wanted to make, I also considered MYKEA's brand identity and how I was going to mold my form to embody the brand's qualities.
MYKEA(IKEA) brand identity:
- minimal
- simple-assembly
- appreciation for material
_________________________________________
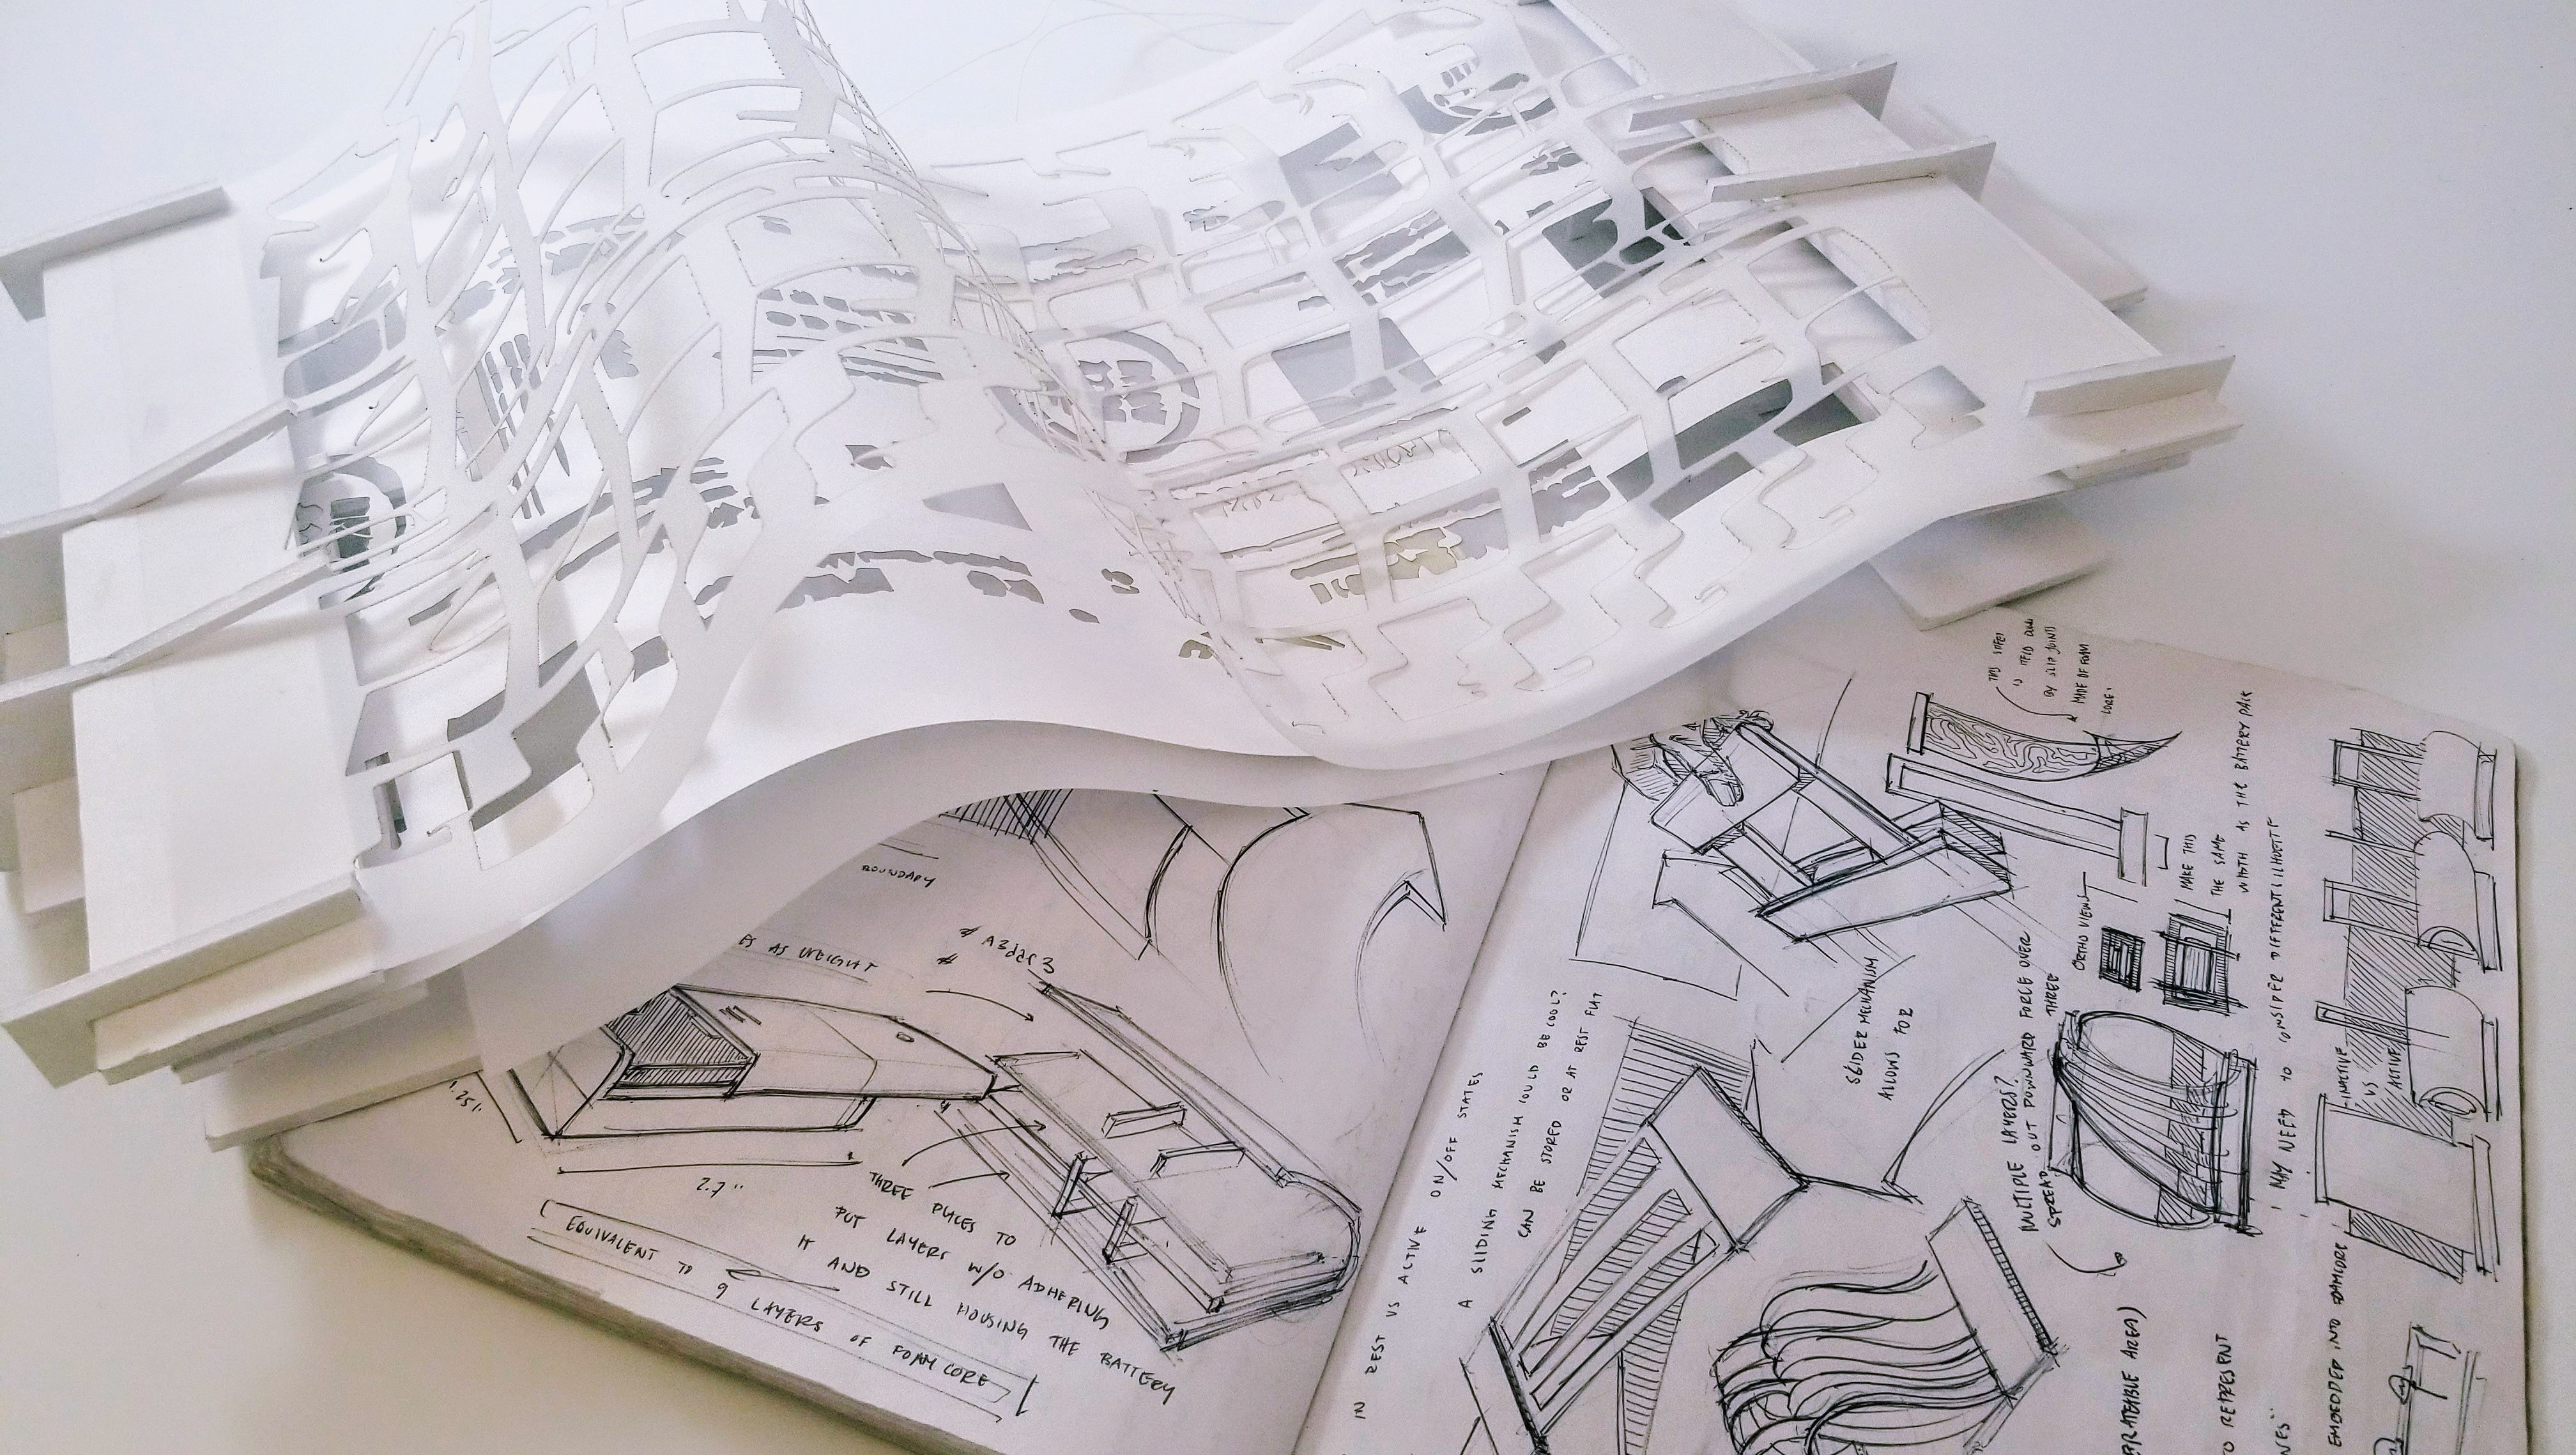
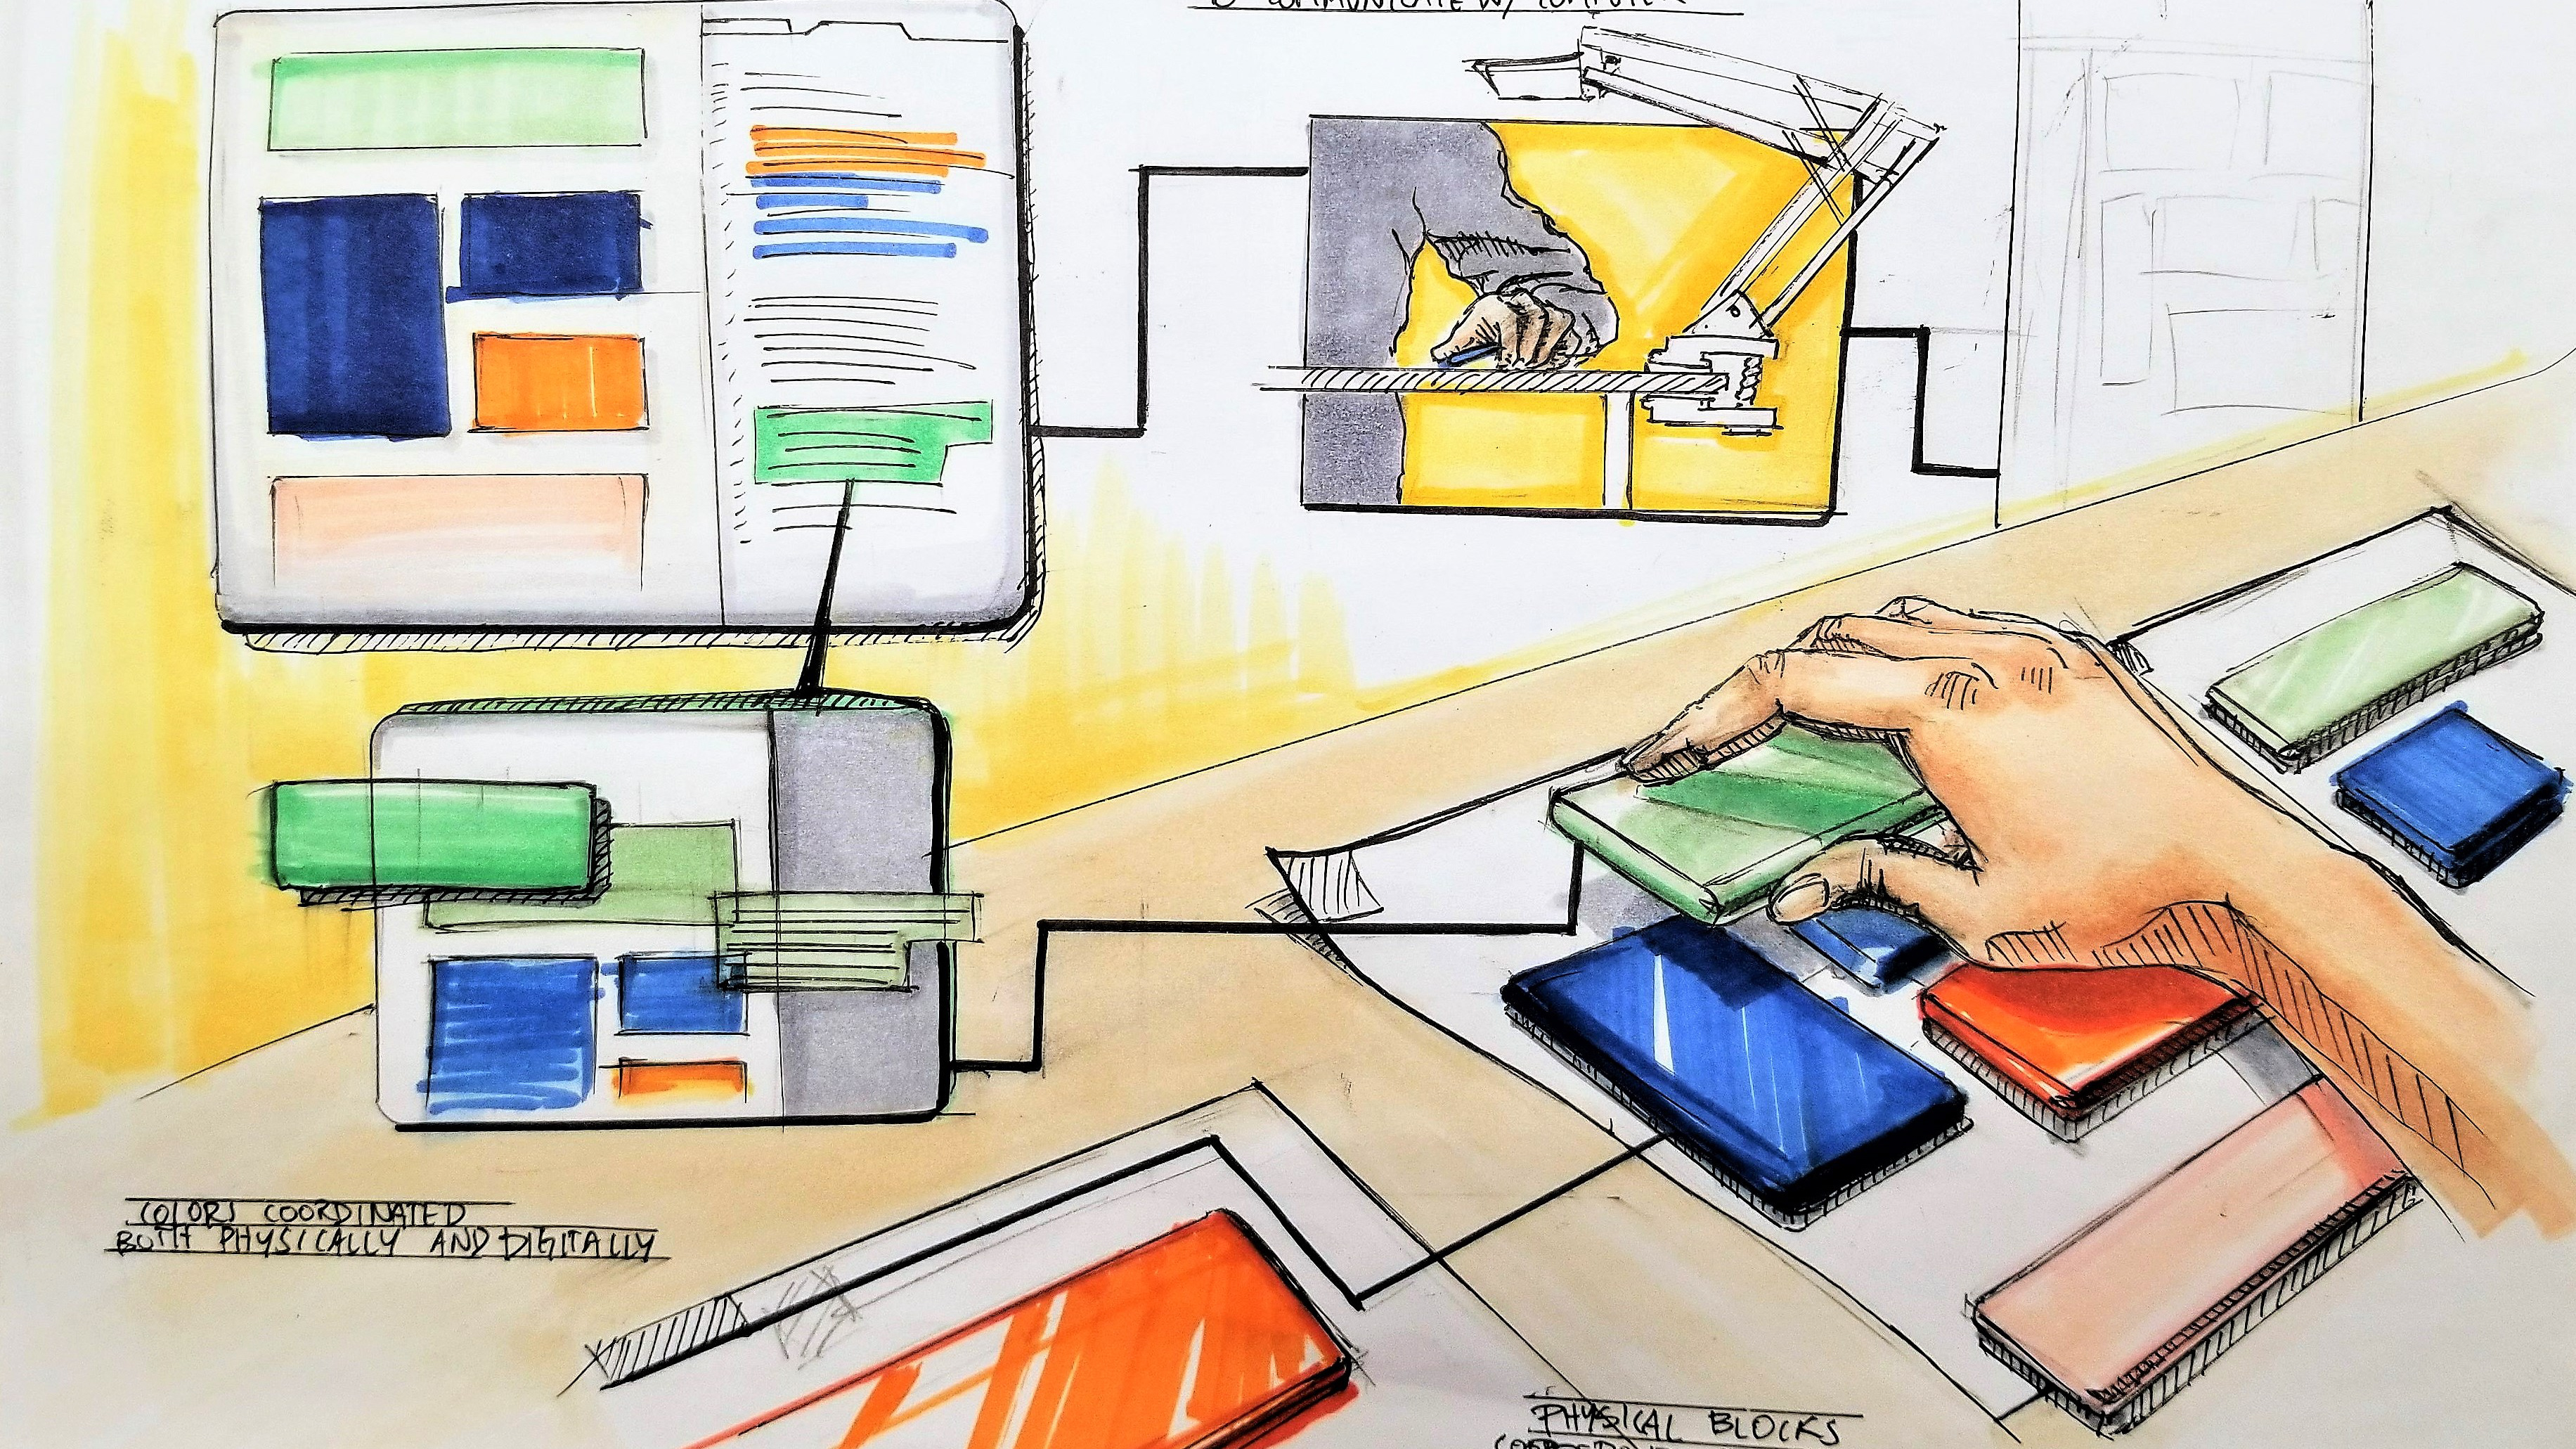
SKETCHES AND THE FIRST ITERATION

When it came time to commit to an idea, I still didn't really have a decision in terms of which design approach I would purse; so my solution was to try and mesh both directions in addition to MYKEA's brand identity. There is a sort of sensitivity that surrounds alot of IKEA [*mykea] products and I think much of it can be accredited to their attention to material. Rather than shroud and change the material, IKEA [*mykea] often lets the material speak for itself, utilizing natural colors and silhouettes.
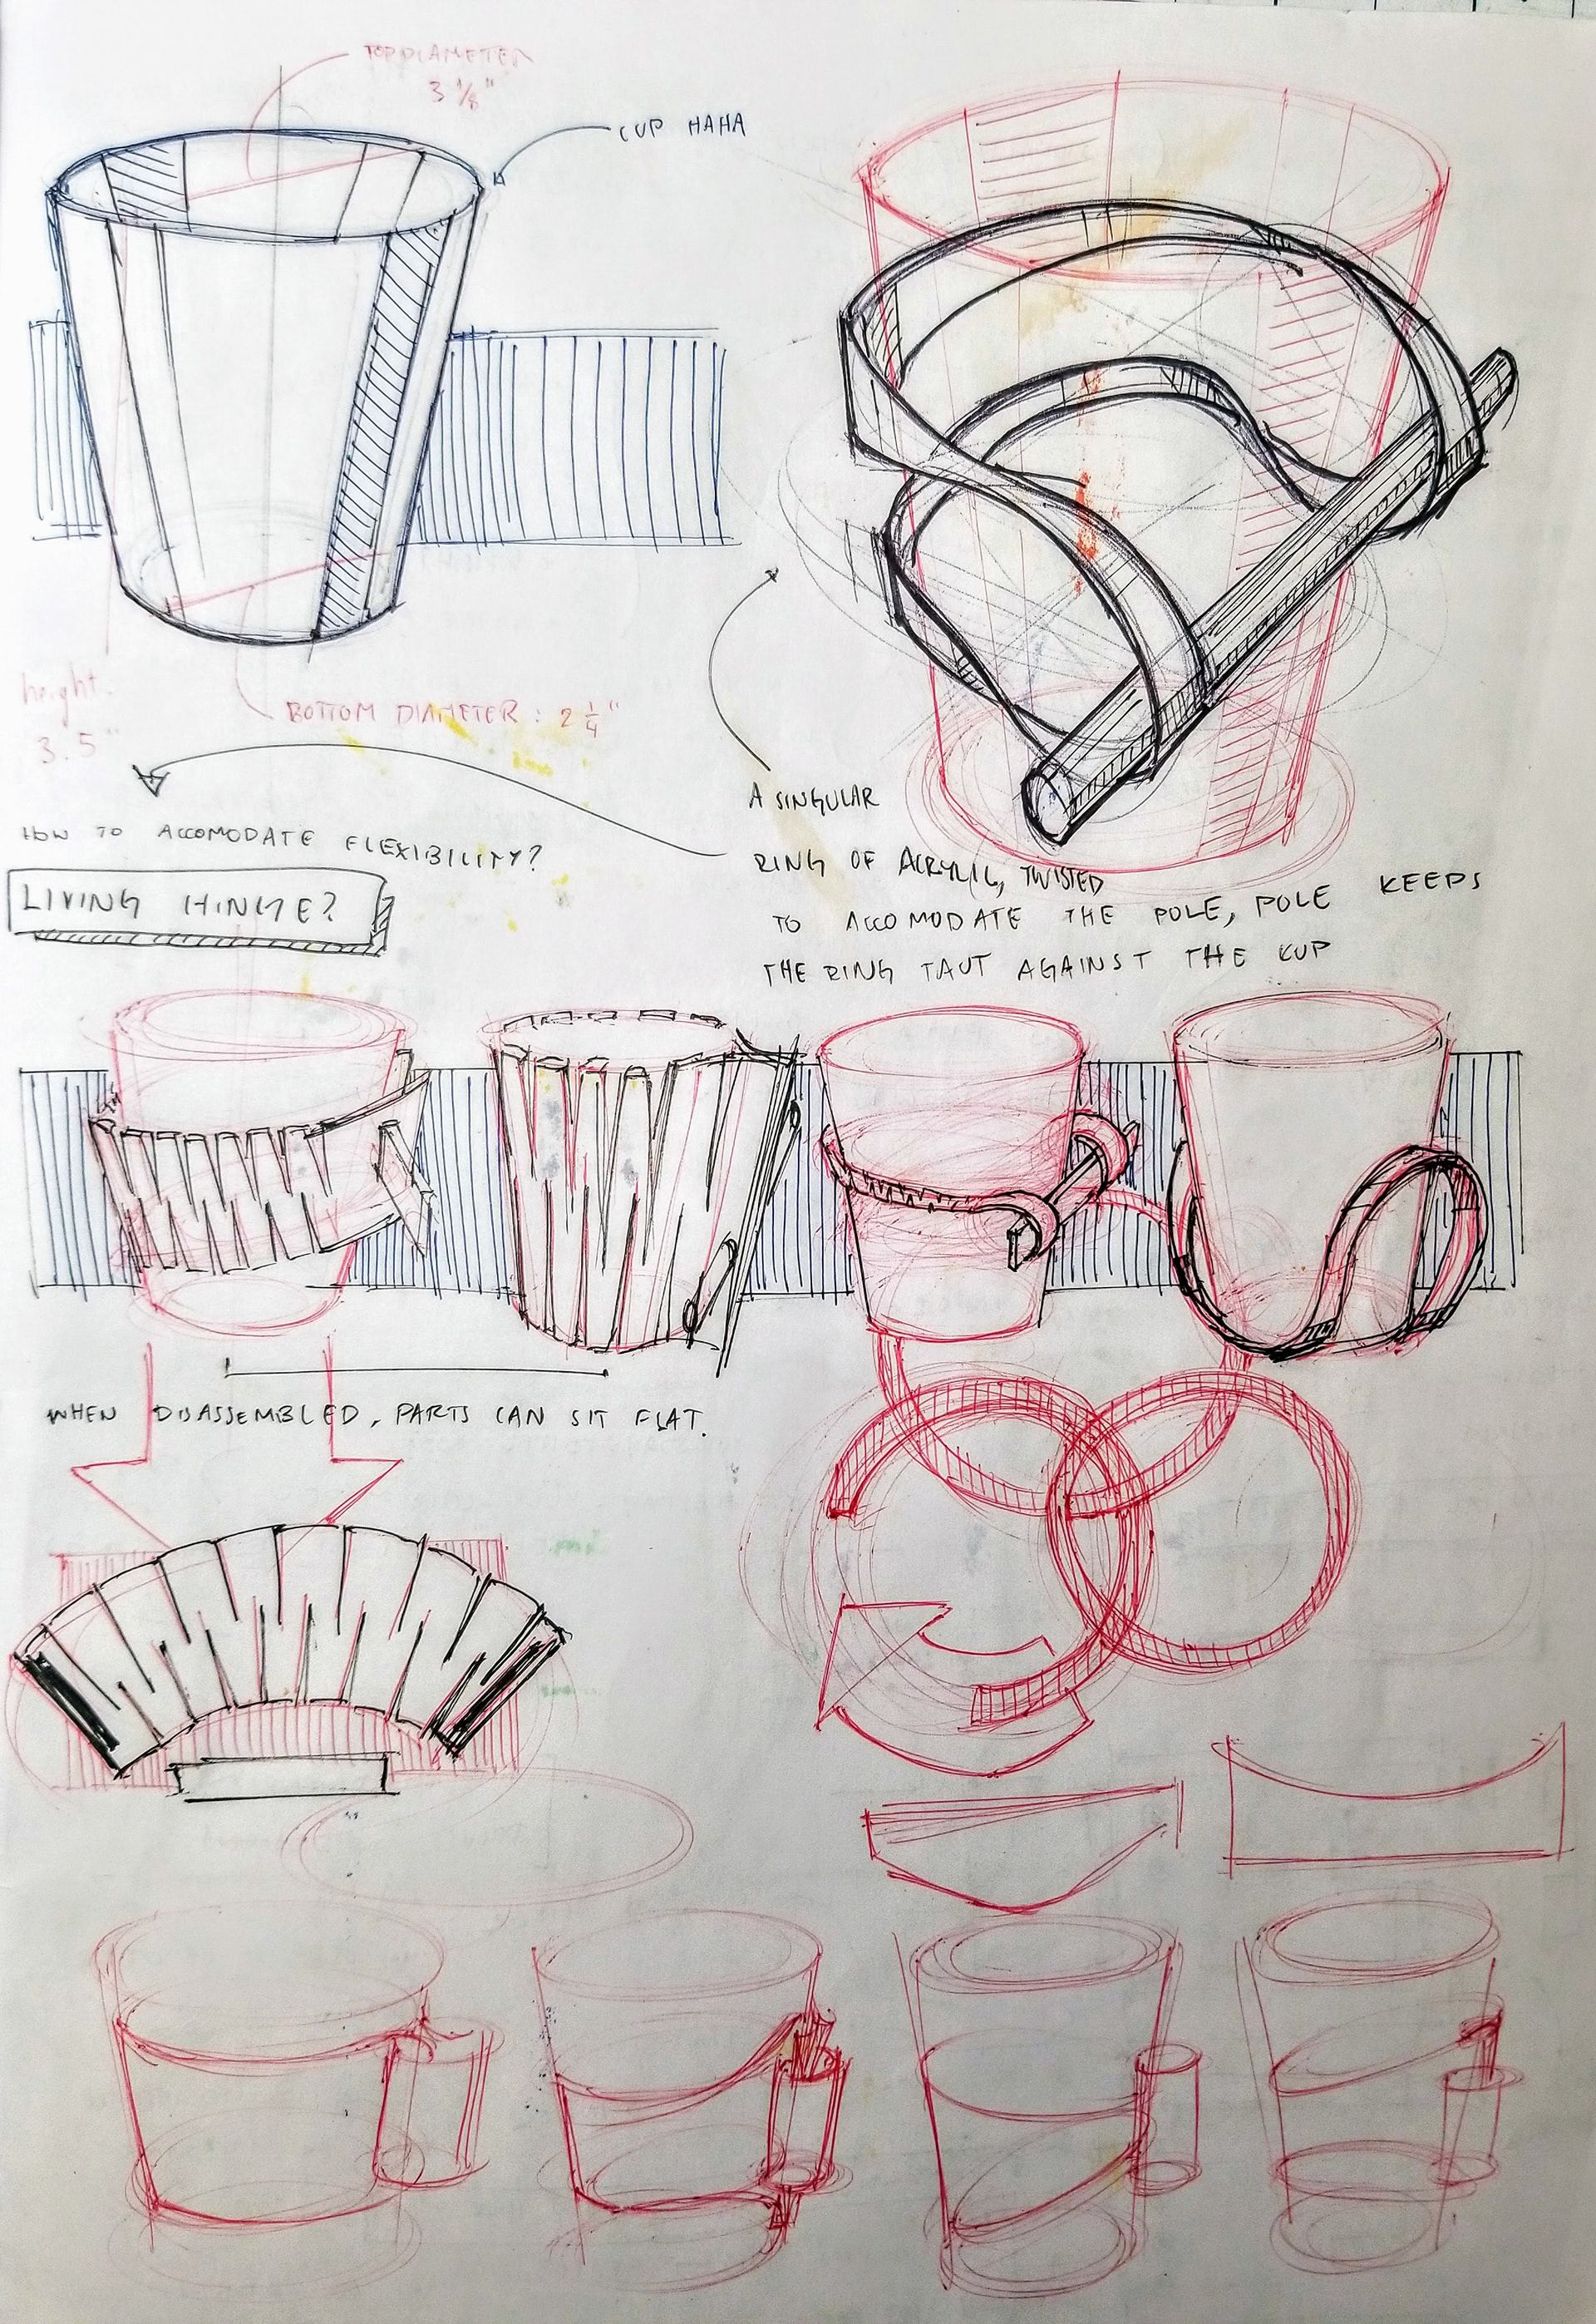
With this in mind, I wanted to highlight the capabilities of acrylic and opted for a living hinge design with a concentric tube closure. It would be comprised of two pieces ,the hinge and 3/4 of a tube, the ends of the hinge would be curved so that when the two curved ends meet, they nest within the external tube. This concept could easily be assembled by just wrapping the hinge around and sliding the tube on to secure the ends.

Issues I ran into:
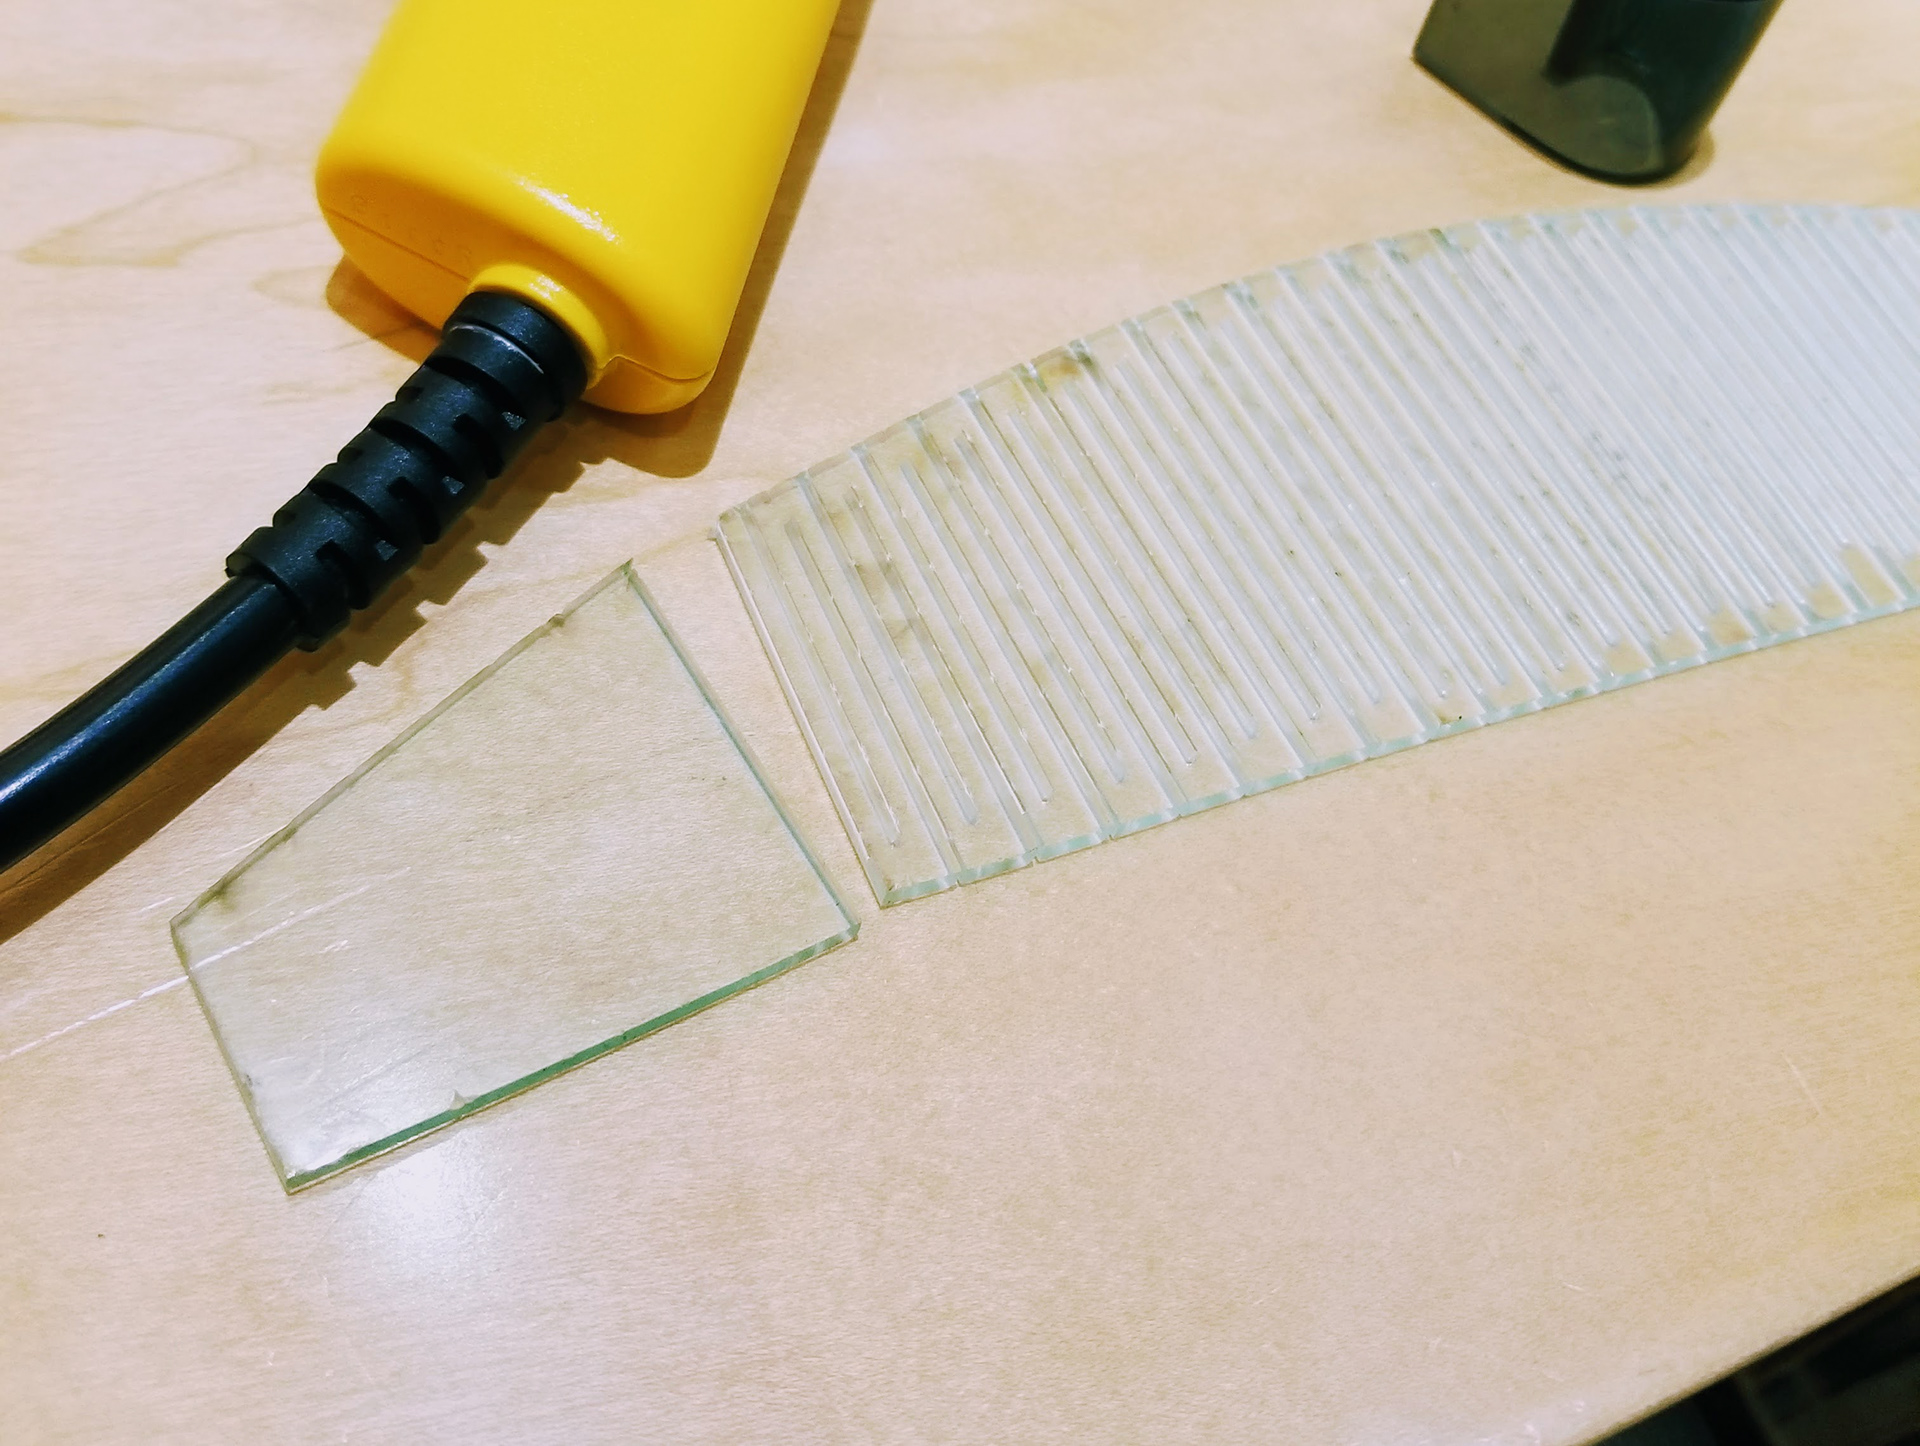
- lasercutting too close to the edge, thus the hinge was not reliable at all
- attempting to bend acrylic before it was fully heated
- was not able to mold an uniform tube-- A potential solution could be to heat gun the acrylic on top of an existing tube and just heating it till it forms to the curve instead of just pliers and t-slot extrusion.
Second Iteration
Even though, I liked my "tube"-closure idea, the production quality of it would be pretty questionable. It was time to try something else.
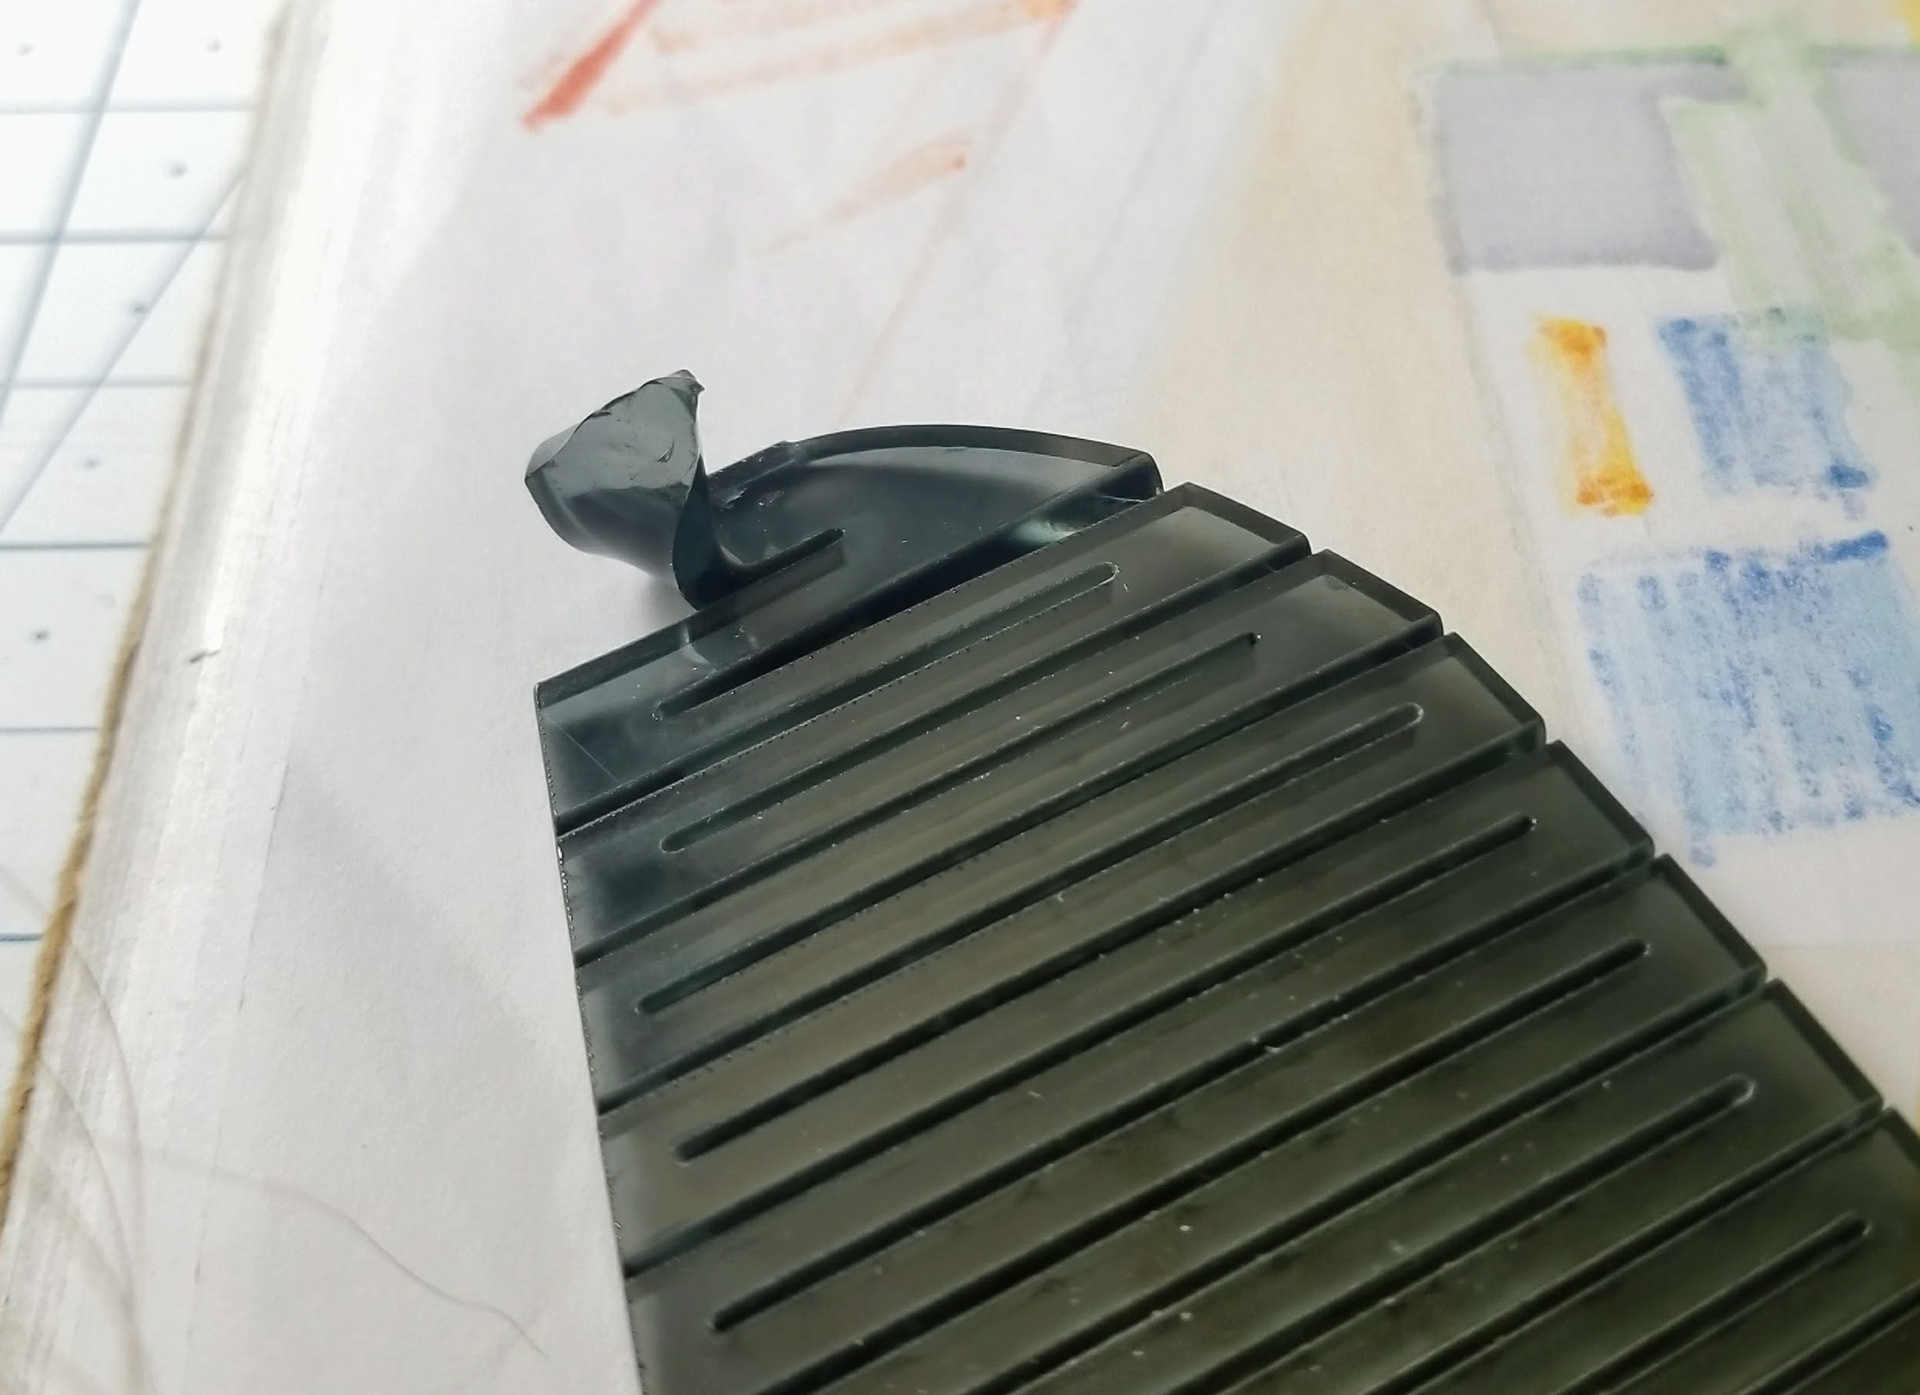
With this iteration I was able to produce a reliable living hinge; at this point, my biggest challenge was the closure. After staring at my previously broken hinge, I thought of coin purse and how they are closed. The "ball" closure system has similar elastic properties to acrylic while still capable of being both open and closed. I remembered seeing somewhere that the ball on the ends could be replaced by different forms; with this in mind, I tried to heat mold a fold in place of the balls. In lieu of an actual understanding of what I wanted my closure to look like, I struggled alot with this concept and I decided it wasn't the way to go.
HOMESTRETCH
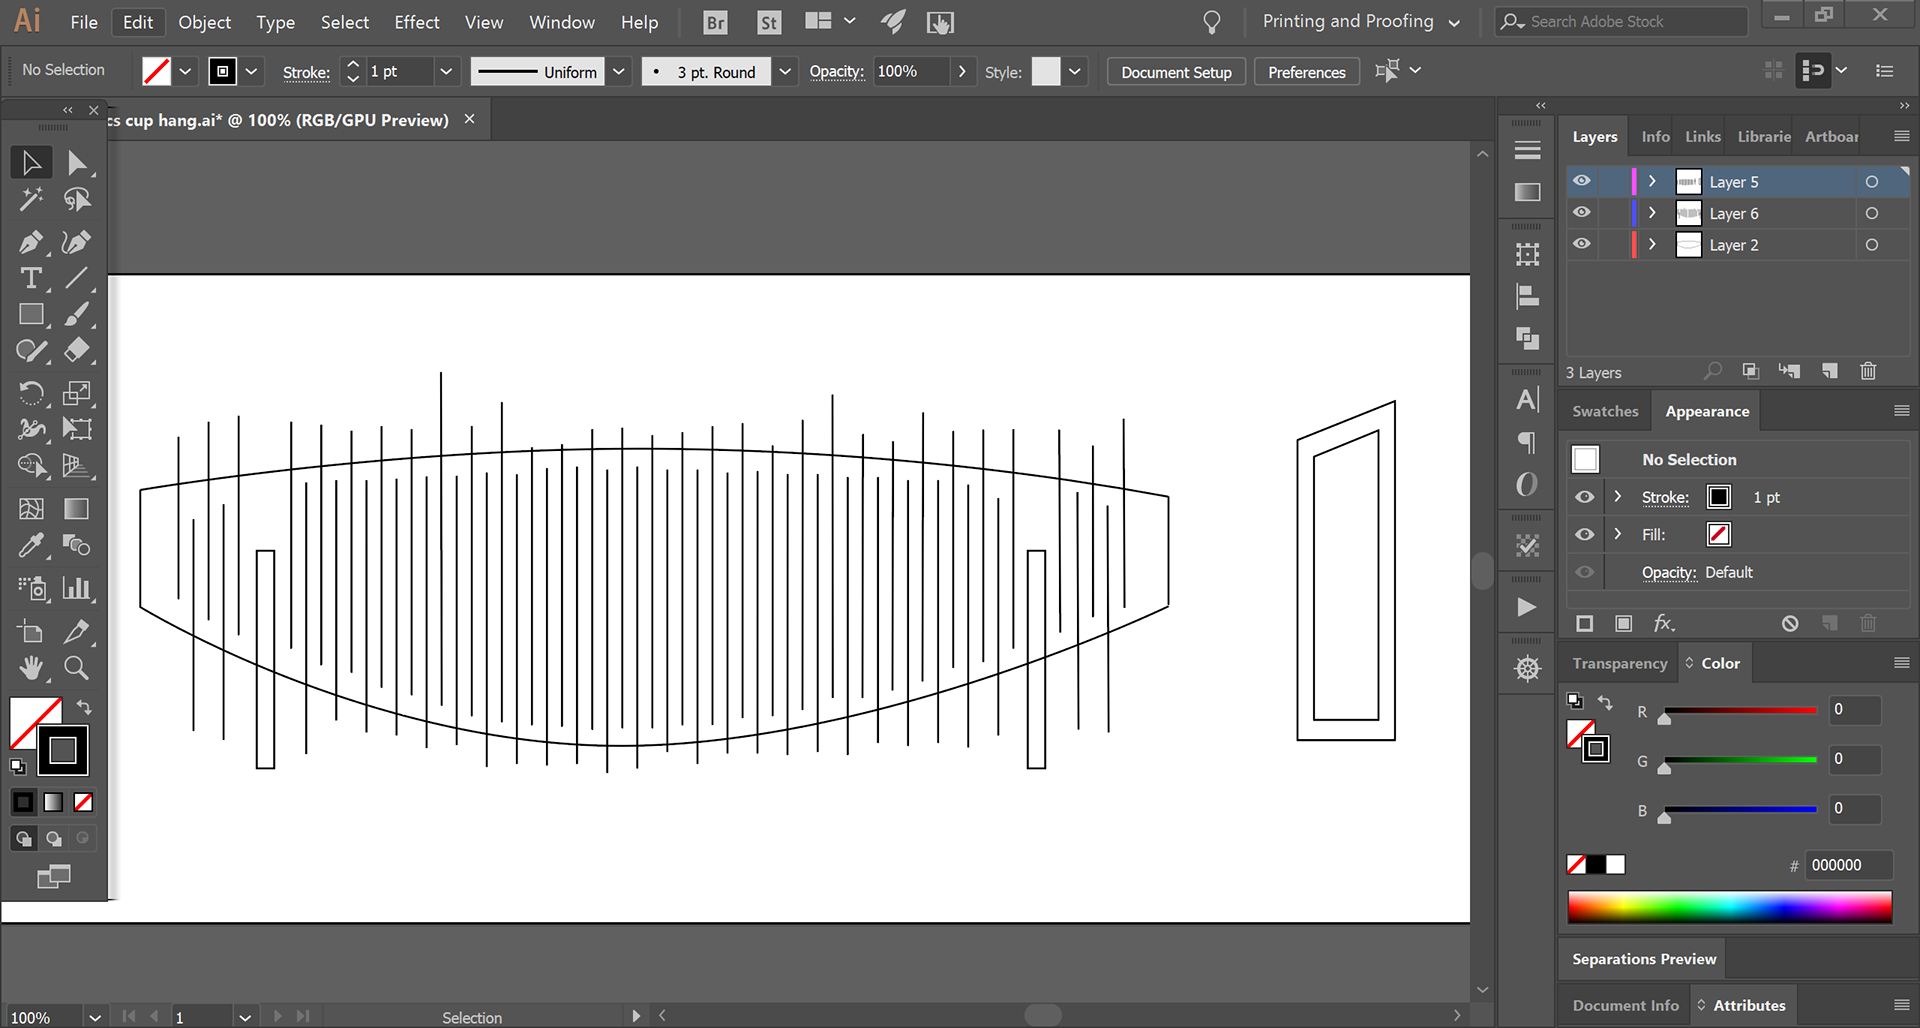
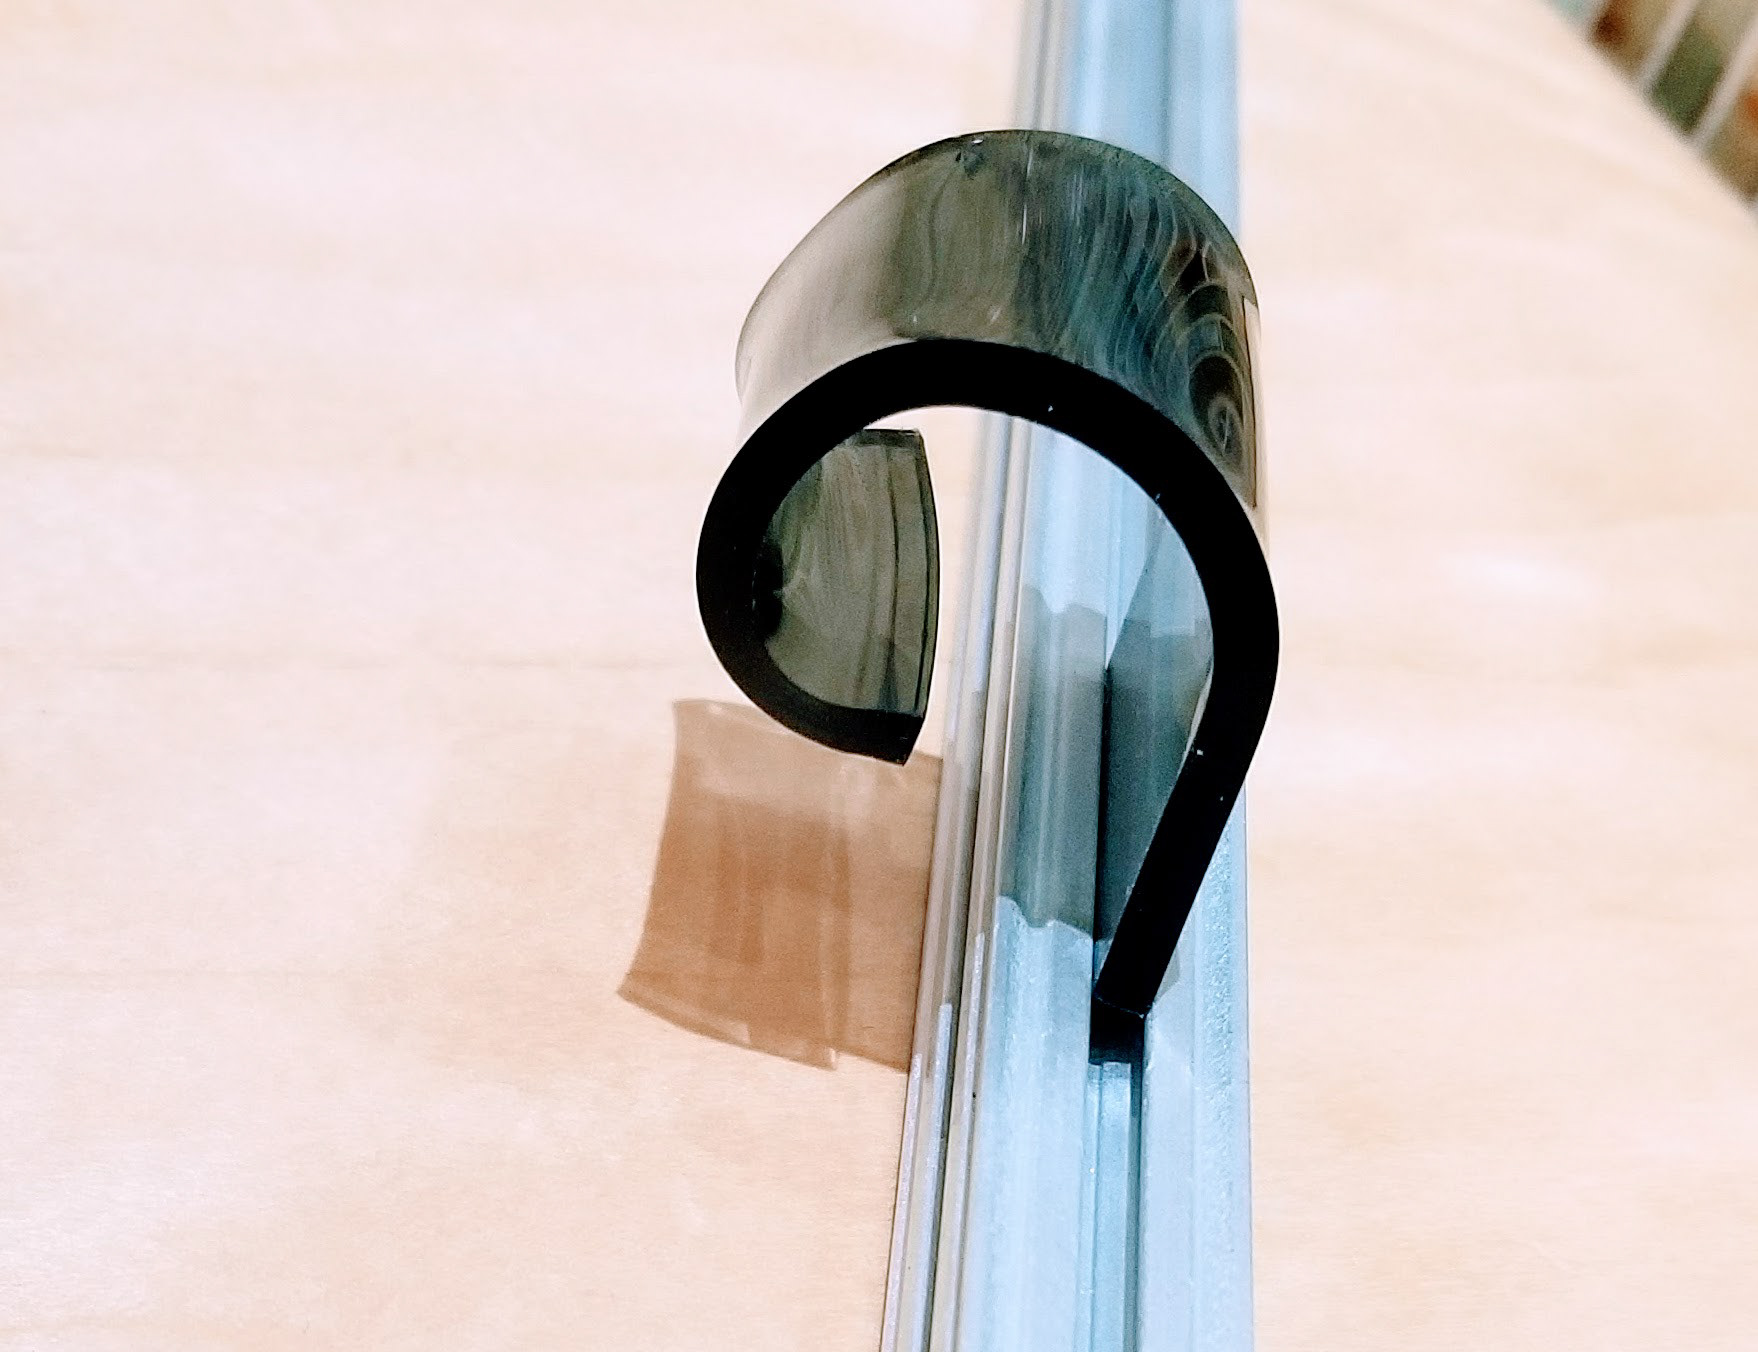
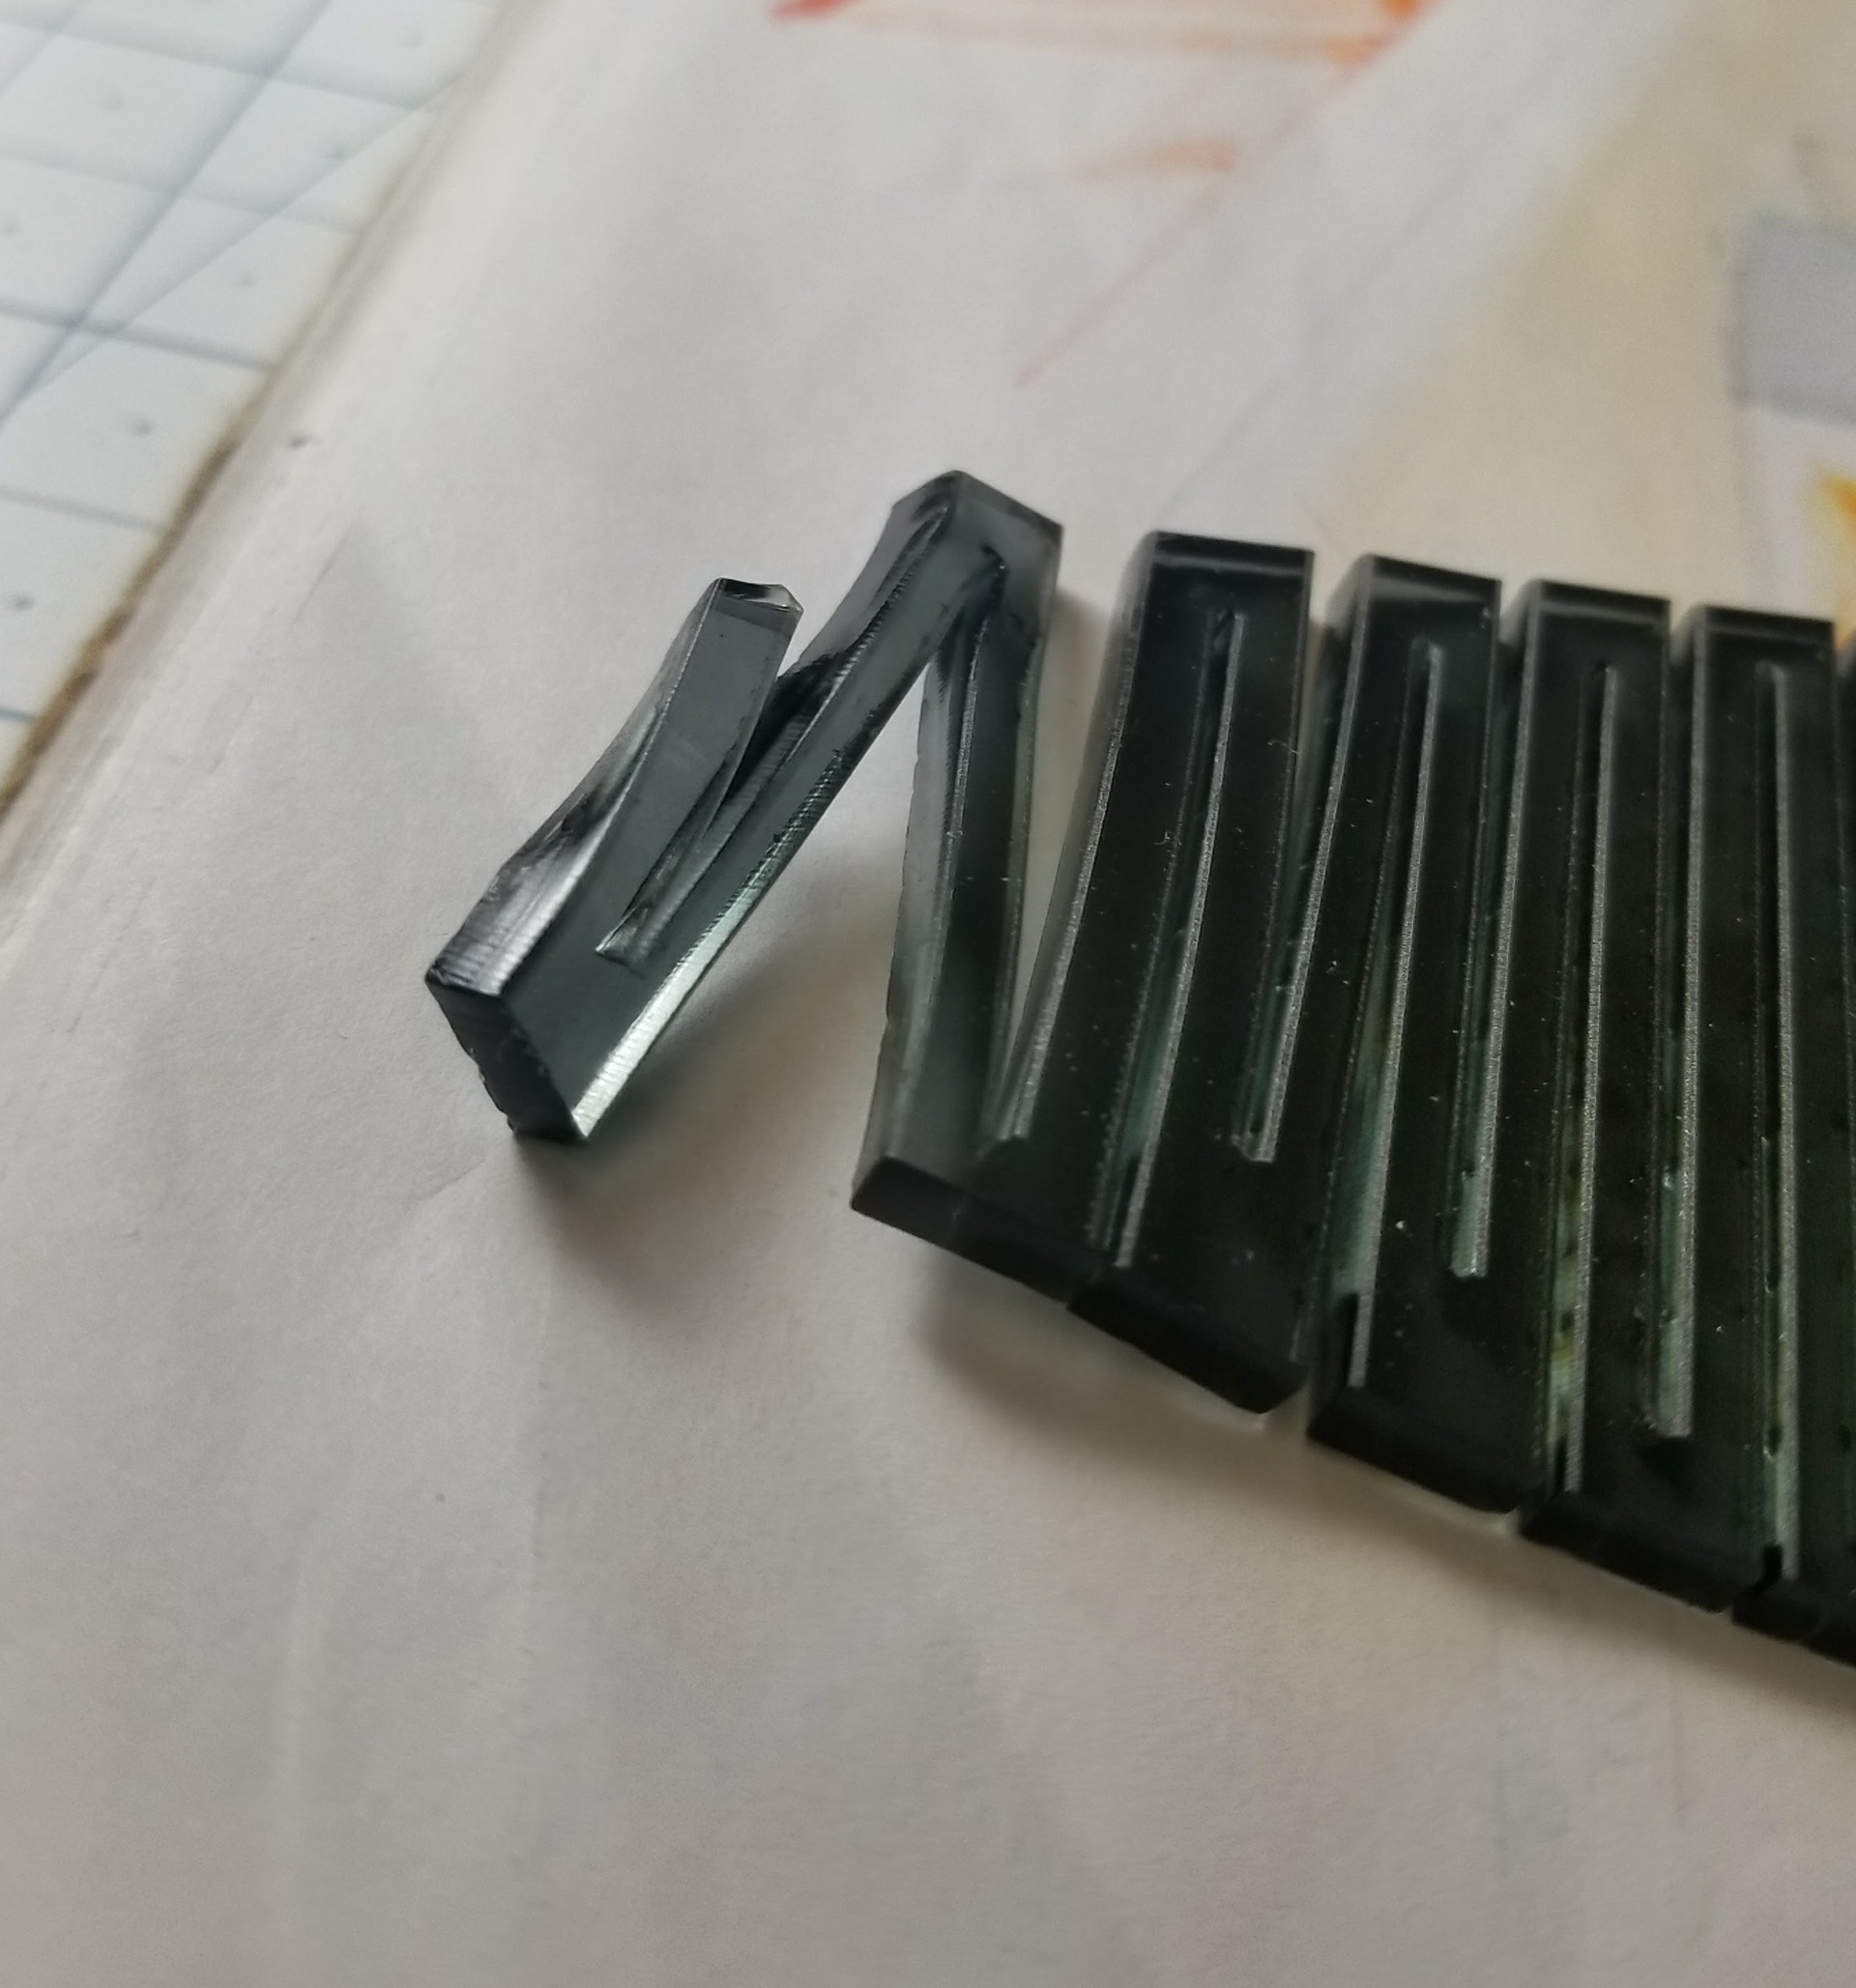
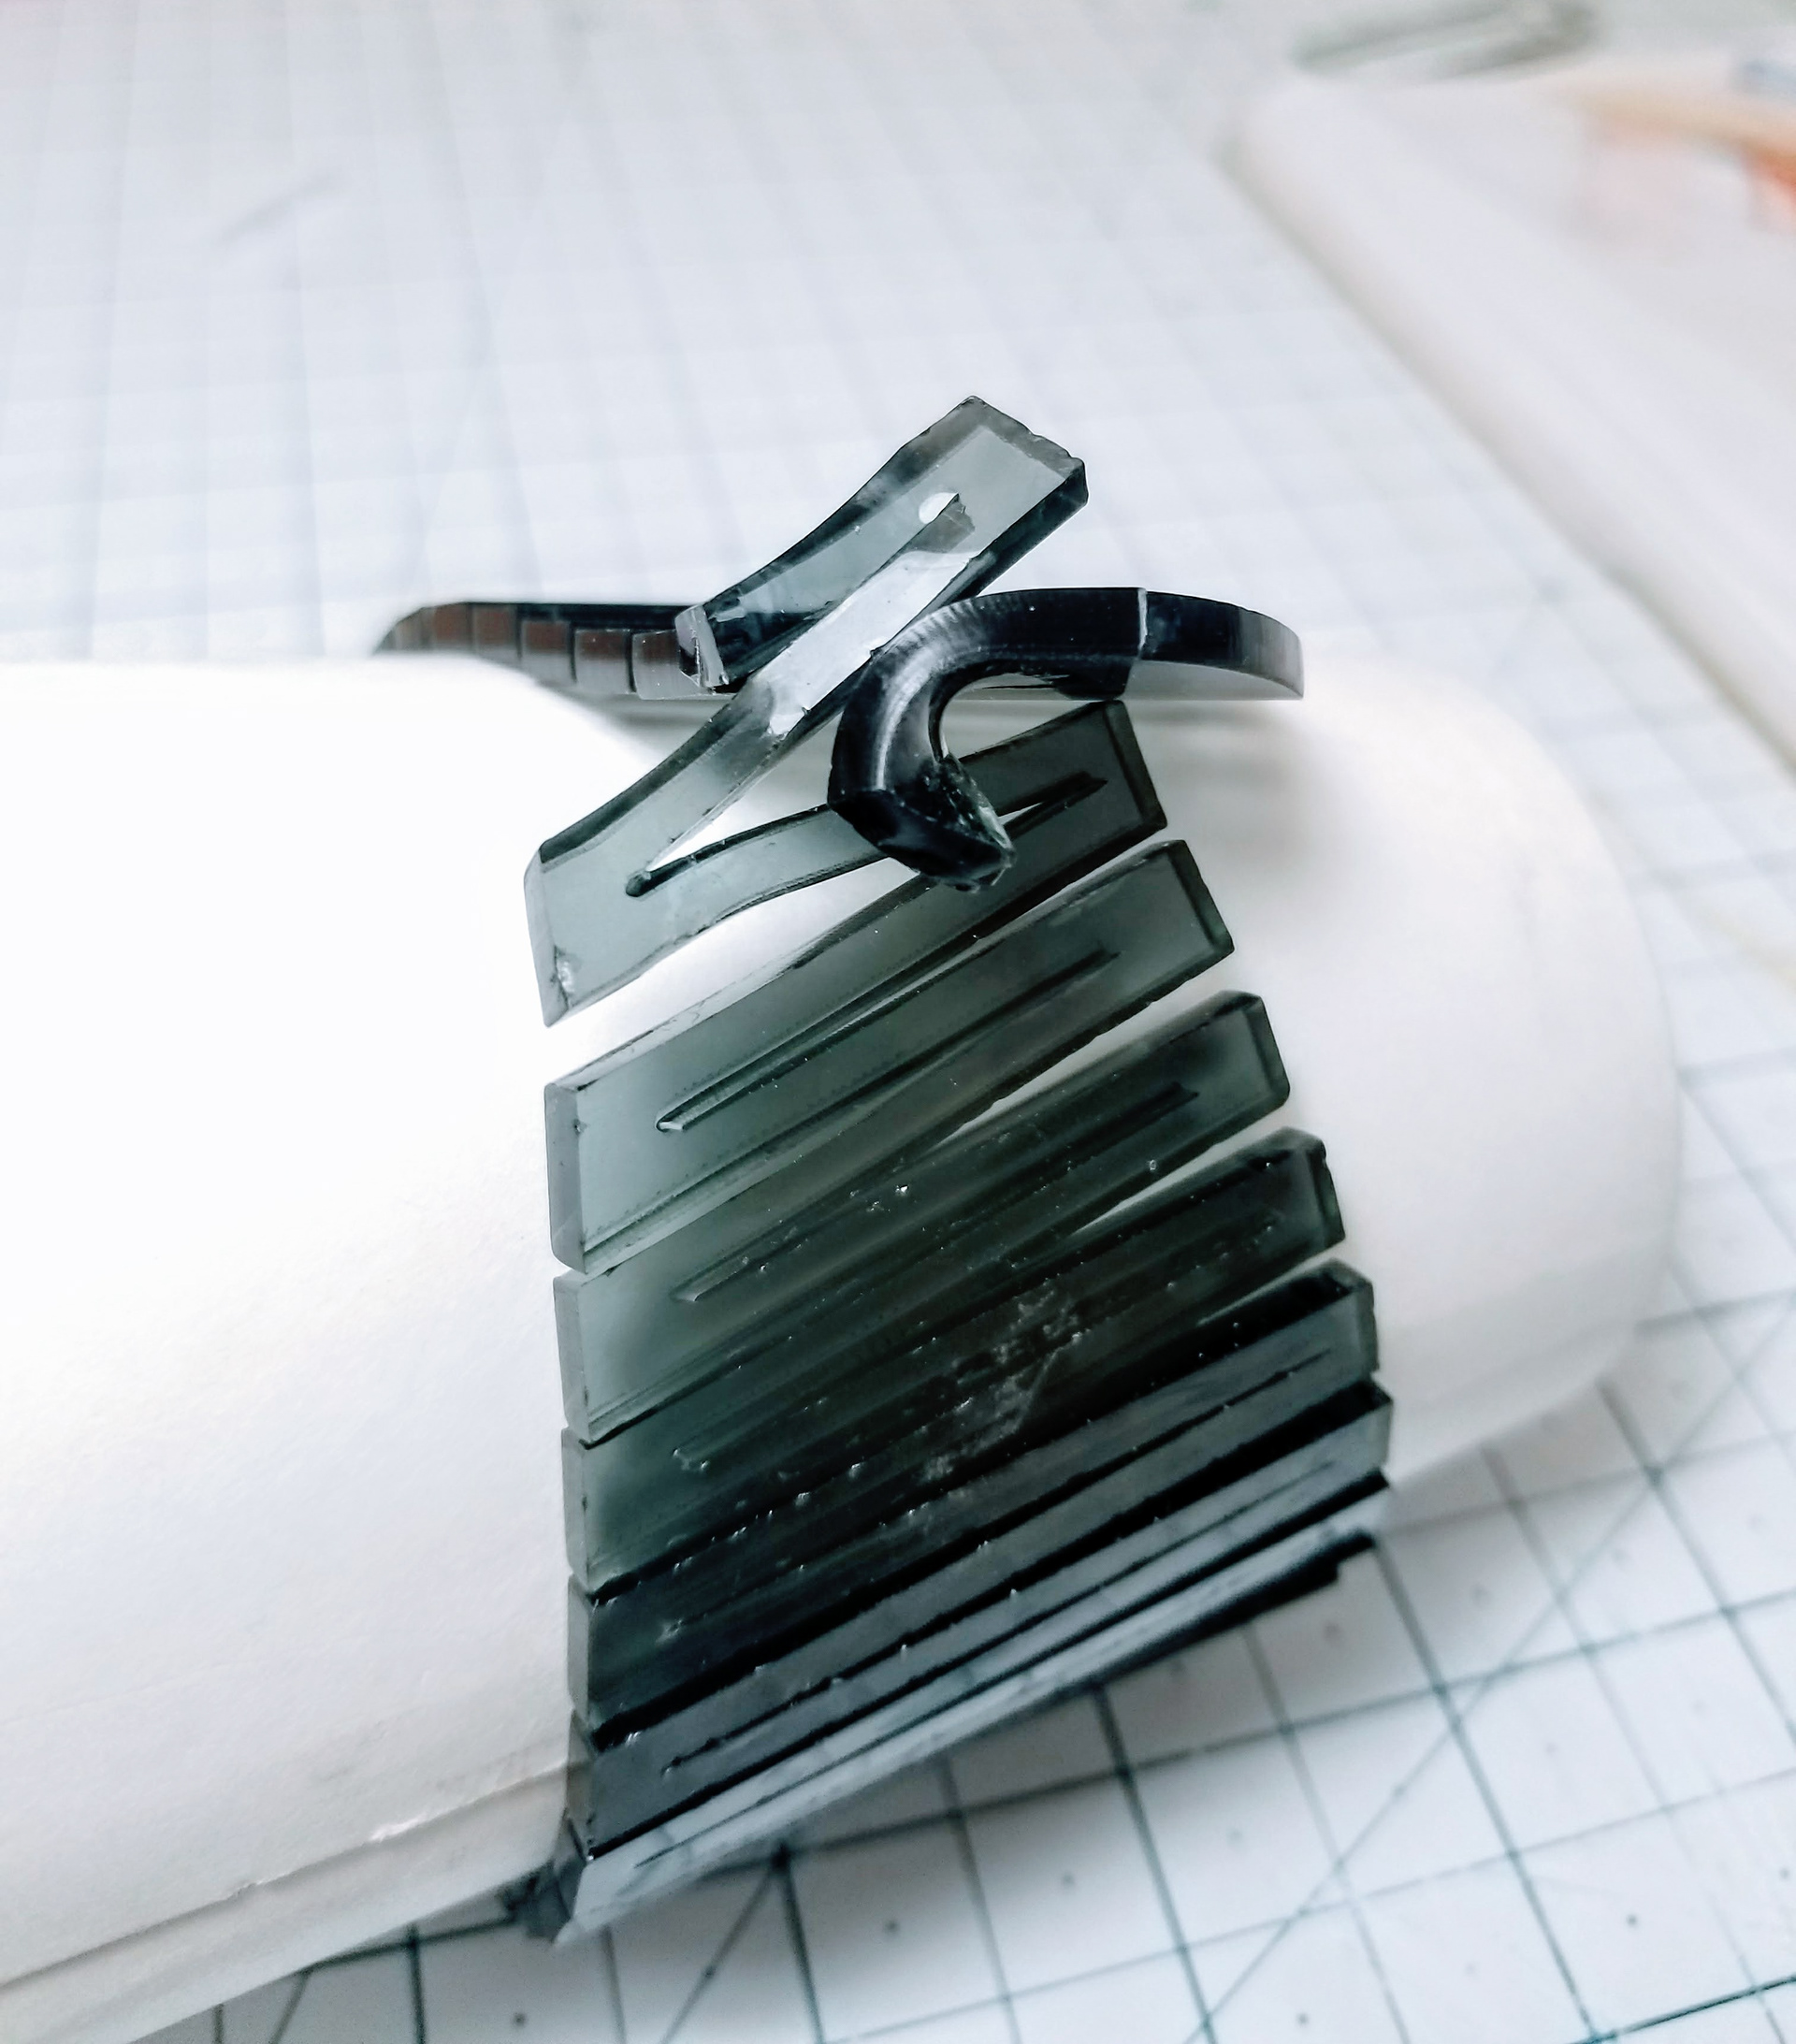
My final solution to the closure problem was to make a second piece that interlocks with the living hinge and hangs off the rim of the paper cup. The hinge itself went through minimal changes from the past iteration as the only thing that changed was two slits being expanded into thicker cuts. I considered briefly to not cut slits on the ends past the thick cuts, but for the sake of visual continuity, the slits remained.

In a wave of lethargy, I attempted to speed up the cut by increasing power. In hindsight, I really should not have done that because it resulted in a burned hinge and me desperately trying to salvage enough material from the scrap to recut it.
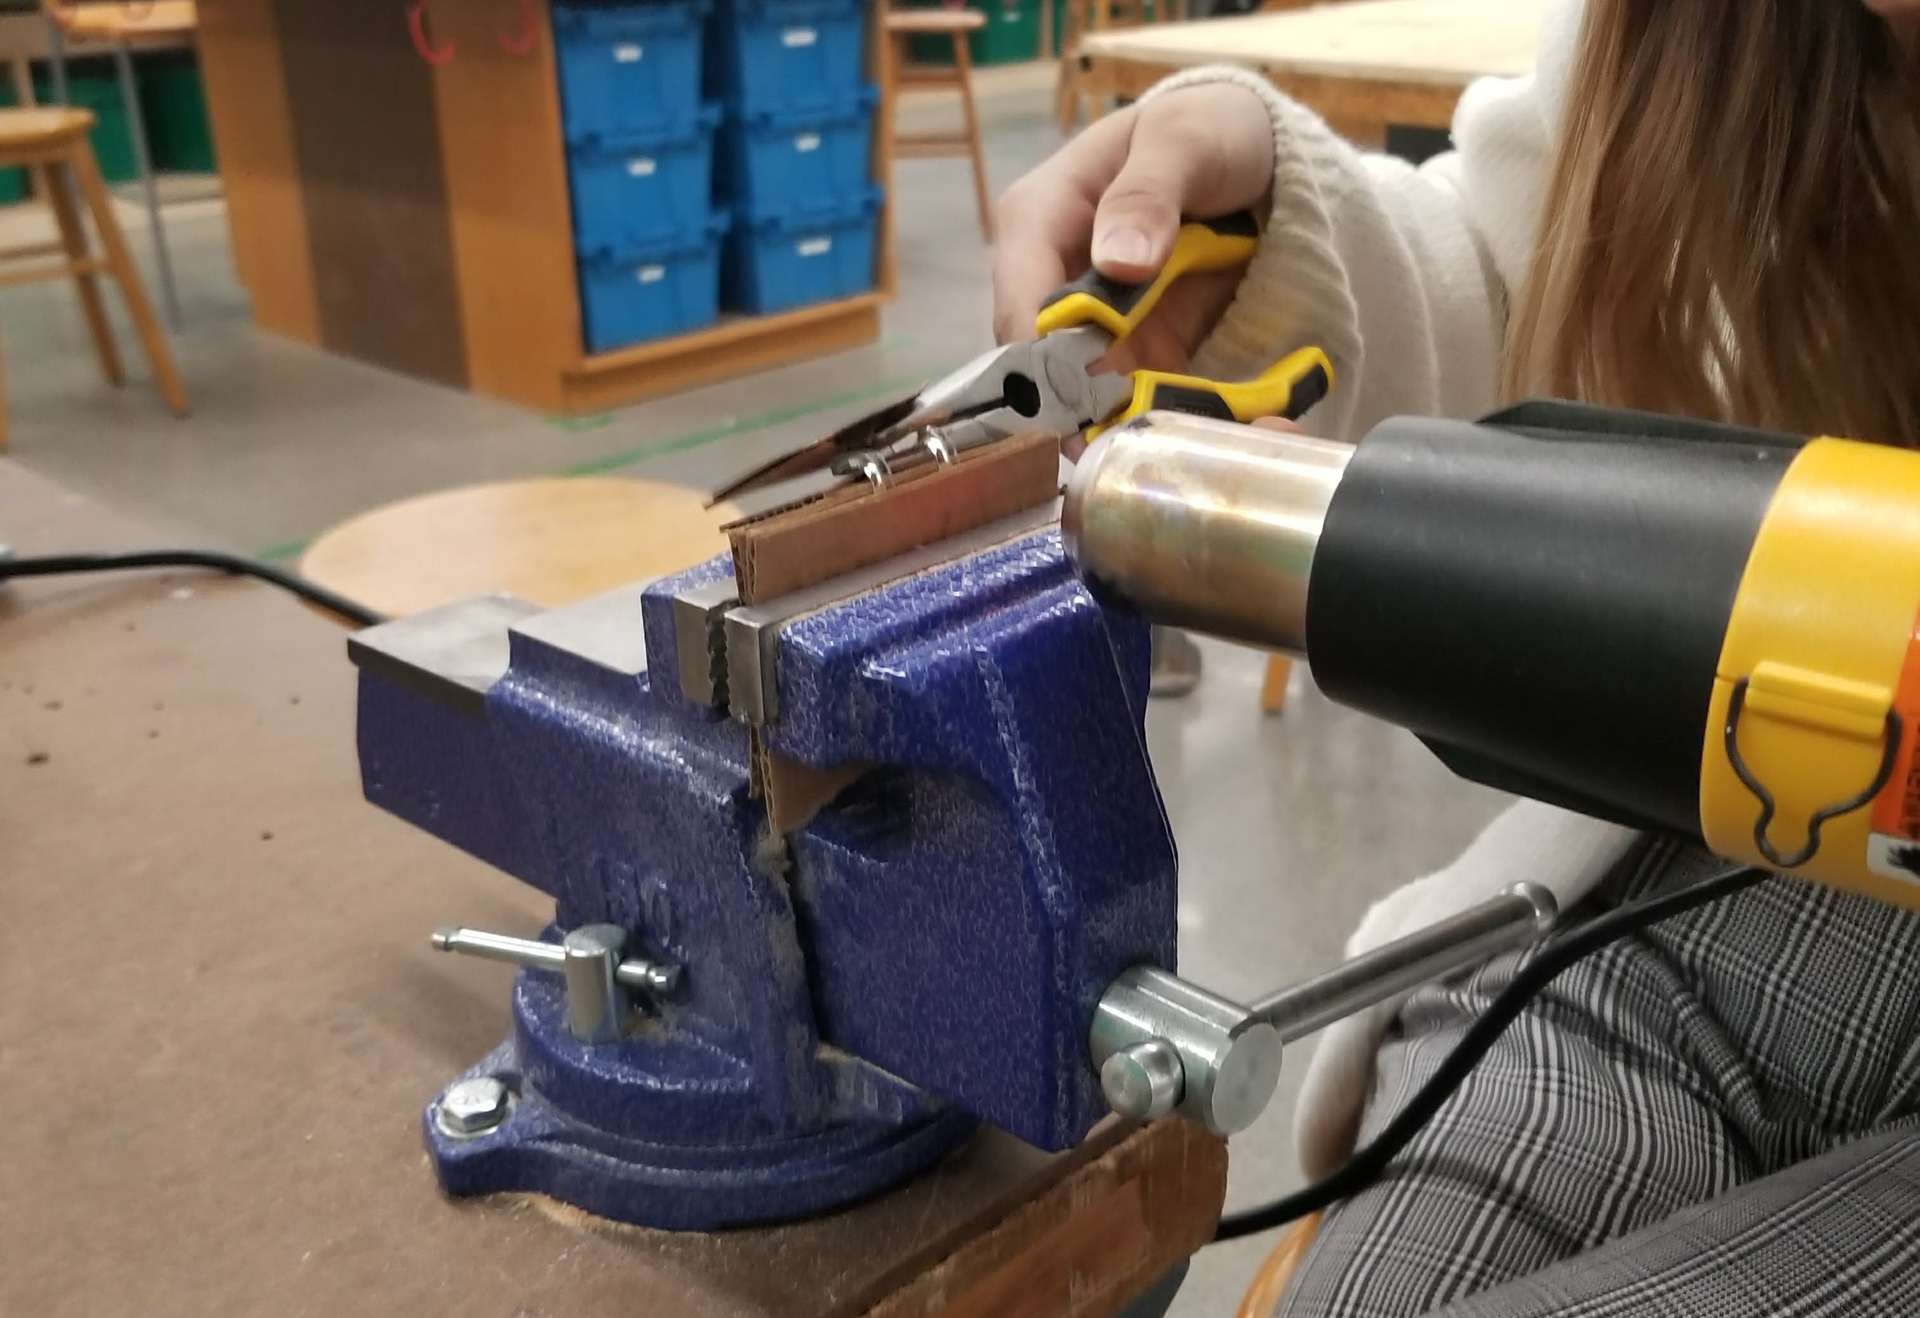
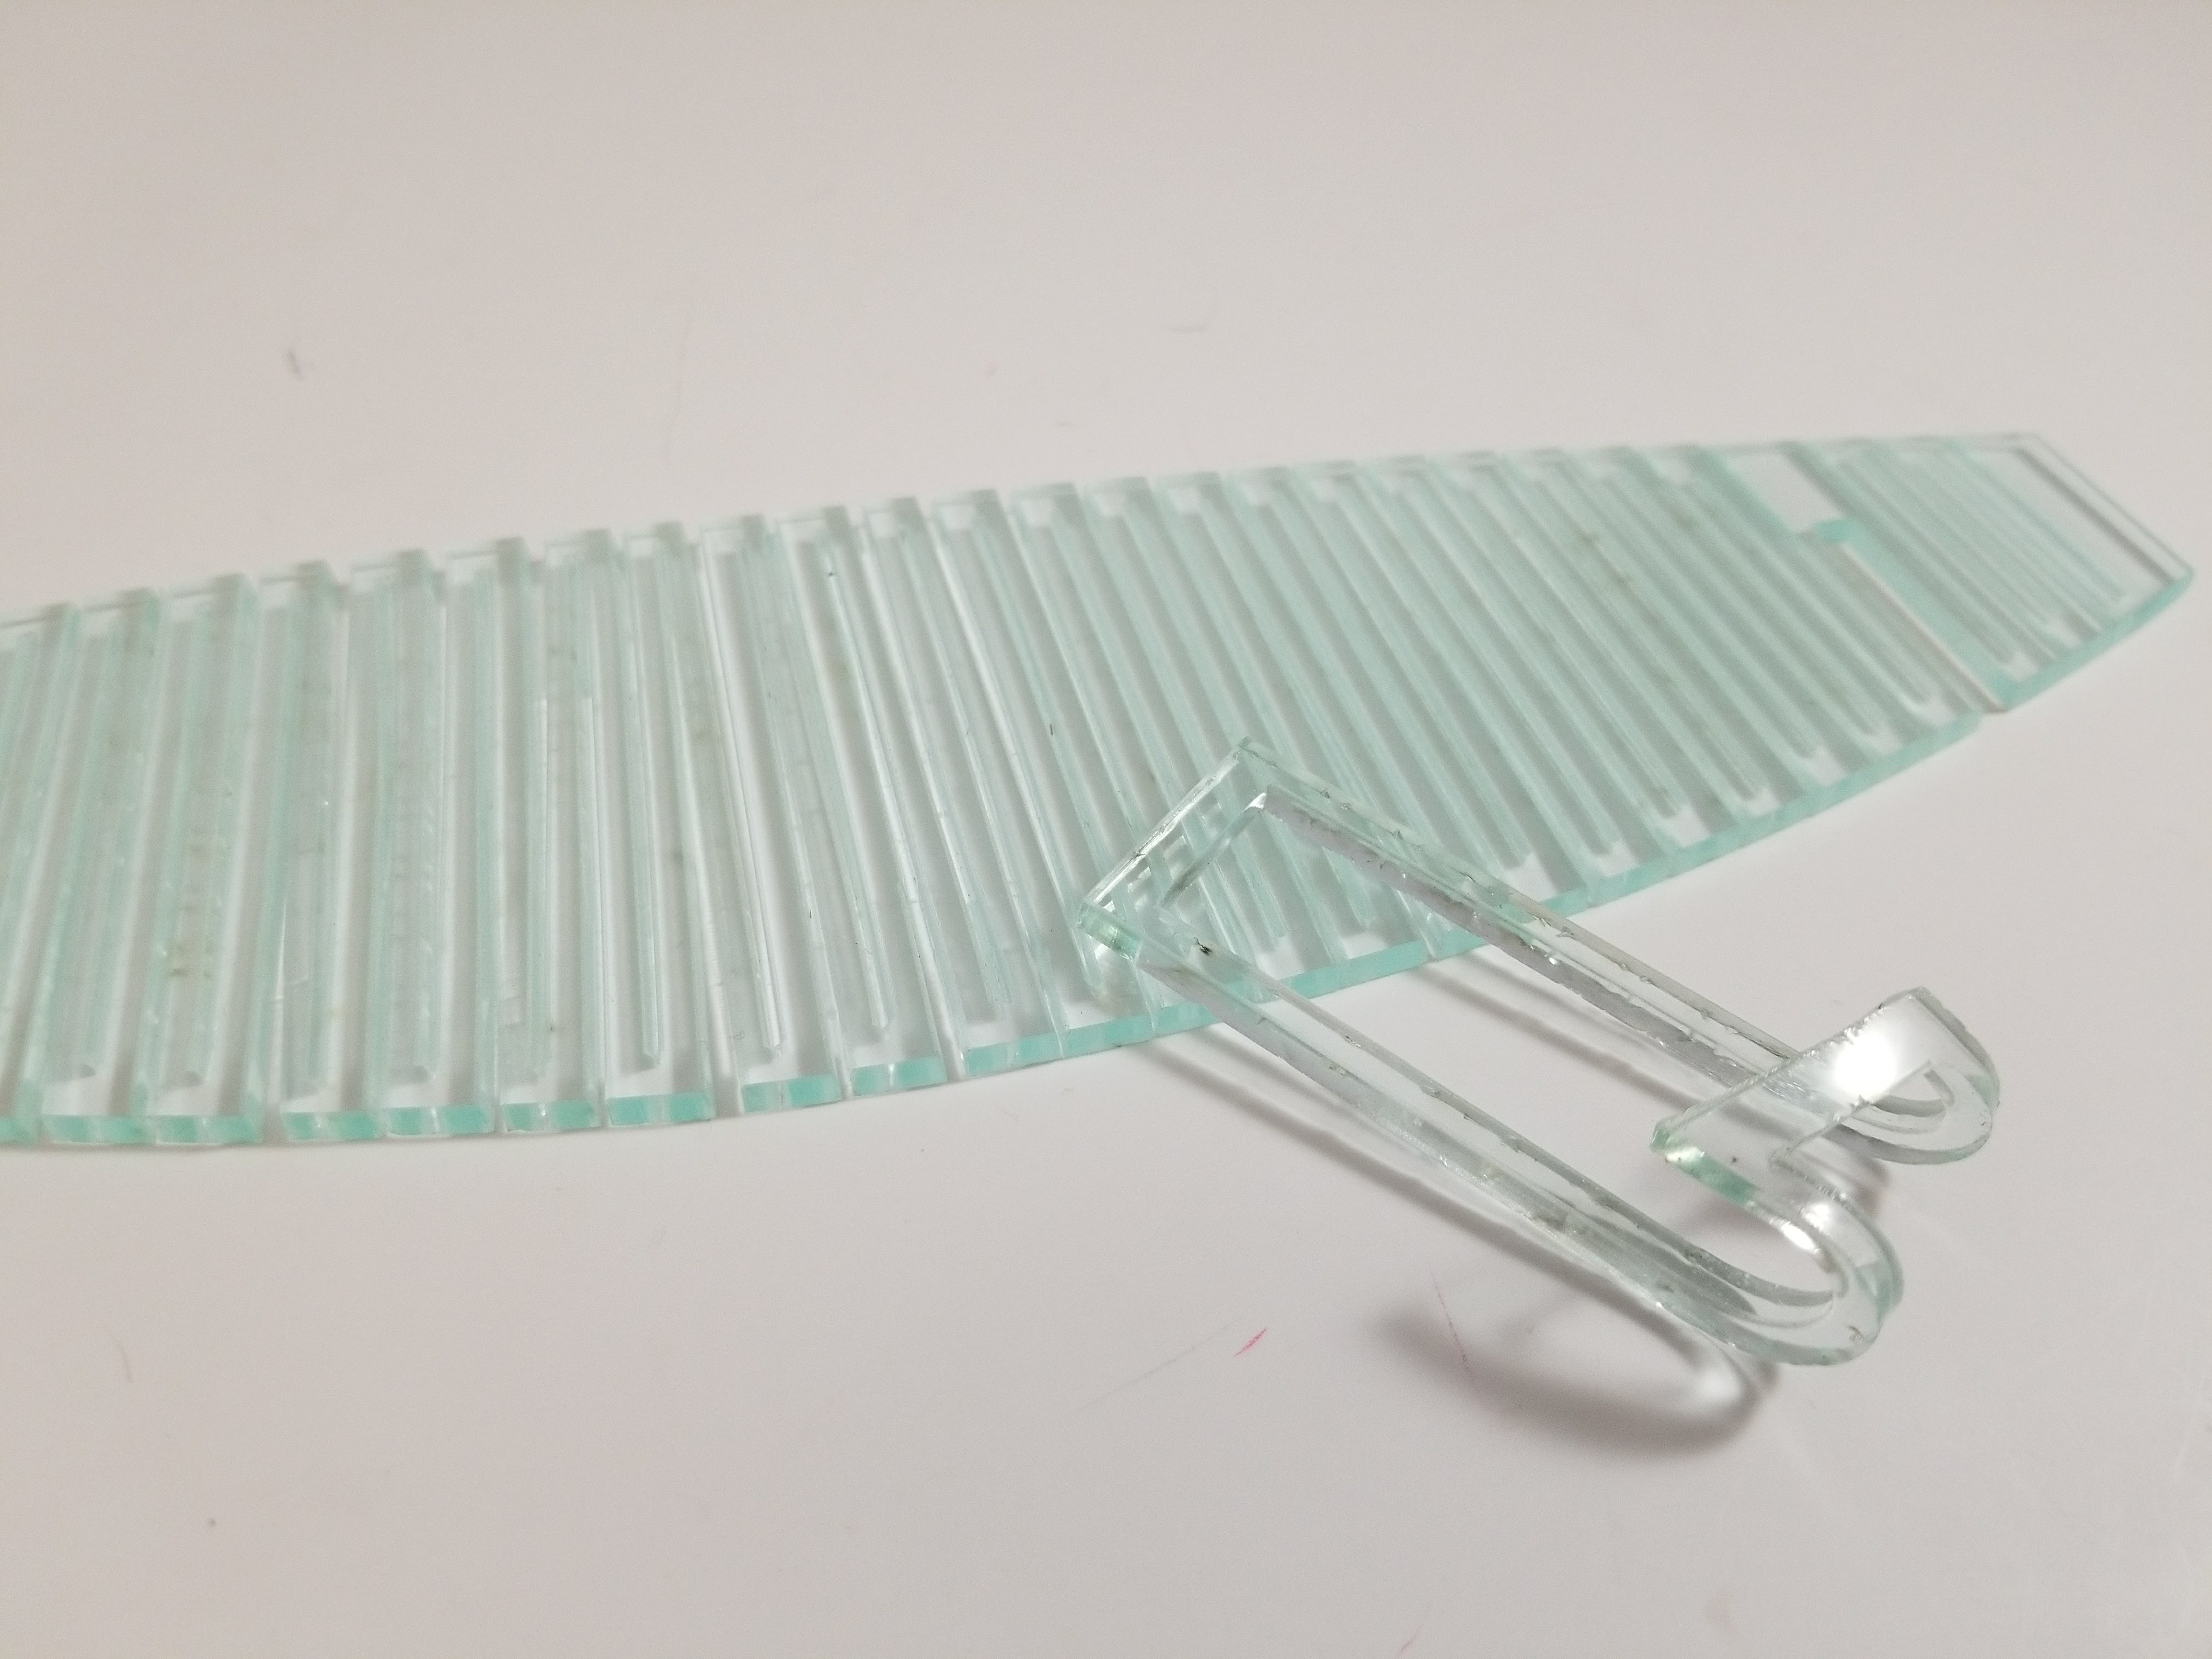
The final step was to mold the hanging fasten with the heat gun. This had to be done multiple times because if I took the bend too close to the center, the overhang would inhibit the hinge from fitting into the fasten.
.
.
.
.